IN BOXING, THEY say styles make fights.
And on Saturday in Brisbane, we saw how that cliché can be just as easily translated to the scrum.
South Africa surrendered a 13 point lead to Australia in a thrilling Rugby Championship match, and although Australia’s late comeback didn’t arrive until the final 10 minutes, it was a series of substitutions around the 50 minute mark that had an enormous impact on the game.
Up until then, Nigel Owens had been having a relatively comfortable day patrolling the front rows. Prior to the the flurry of front row subs, Owens had yet to reset a single scrum, and just one of the seven at that point required him to blow his whistle.
The reason for this was not Owens himself, but the players locking horns. The starting contingent on both sides came to engage in clean scrummaging, and that’s exactly what we got. South Africa controlled the scrum, without dominating, and it was only when the cavalry arrived in the second half that things got messy.
While ‘The Beast’ Tendai Mtawarira was his usual indestructible self at South Africa’s loose-head, some patient, clever work from Sekope Kupu meant that he absorbed the pressure, without racking up the penalty count.
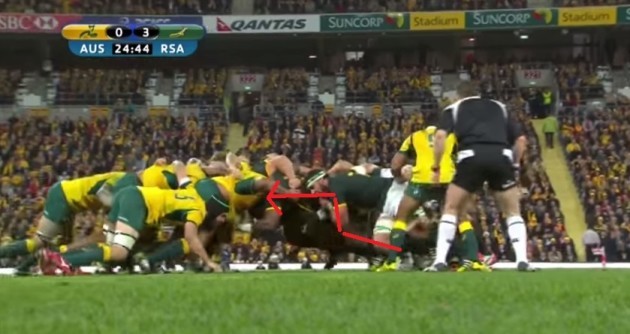
In this early scrum, we can see how the players set up, with both props lined up square and straight. Mtawarira’s body is parallel to the ground, with a bend of around 120 degrees at the knees – the ideal body position.
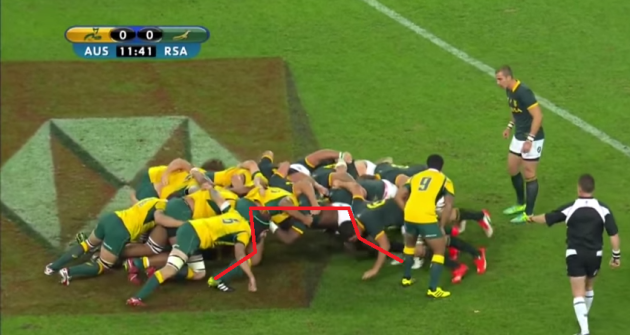
As the scrum progresses, we can tell from the paint on the pitch that South Africa are moving forward. In the picture below, note how as Mtawarira moves forward, his back remains parallel to the ground, rather than driving up into the air as we see many looseheads do.
Also, his head is outside Kepu’s shoulder, rather than under his chest. When faced with a drive this powerful, most tightheads will begin to turn anticlockwise to prevent themselves going backwards, and ultimately concede a penalty, but Kepu just absorbs the hit, maintaining his good body position, and the scrum remains stable.
He lost about two or three yards, but at that end of the pitch, it’s no real loss.
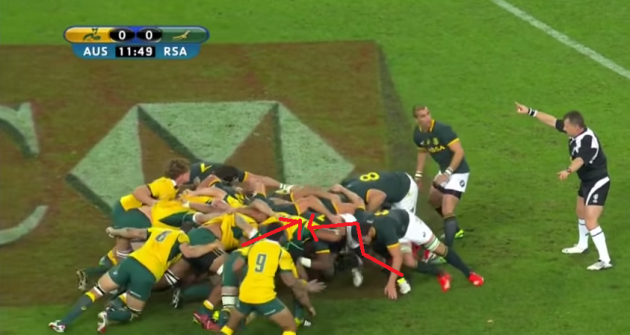
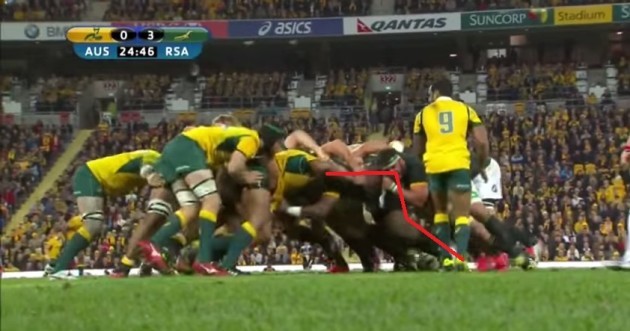
The Beast stepped up the pressure on Kepu at the next scrum just out from the Australian line, and but for a well controlled in and out from the Aussies, they could have been in trouble.
We can see from the still image below that while both players were driving square and straight, it was Mtawarira’s height that allowed him to take advantage of Kepu.
The lower to the ground a prop can drive, while remaining parallel to the ground, the more difficult it is to stop.
It was turning into one of the most enjoyable – and clean – scrum contests we’d seen at test level for quite a while, and around 20 minutes in, we saw a great back and forth between Mtawarira and Kepu.
The South African initially got the nudge, but Kepu then drove back, before Australia sent the ball into the backline.
Following the pattern of the game, it was another great scrum caused by props playing within the rules.
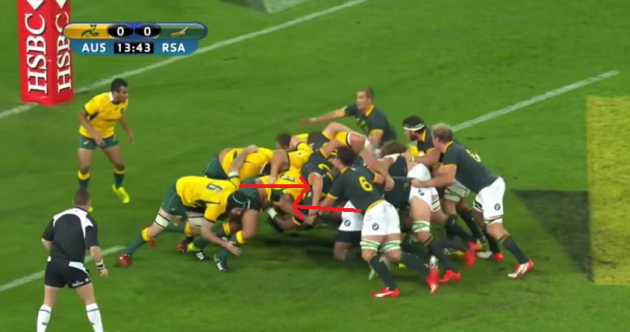
The still image below shows just how well the pair set up. Both had identical, square line ups, with a perfect bend in the knees and their back studs just off the turf.
Draw a line down the middle, and they’re almost symmetrical. But also, the binding means that neither drops the scrum. Kepu’s is long and on the ribs of Mtawarira, rather than under the armpit as we’re used to seeing these days.
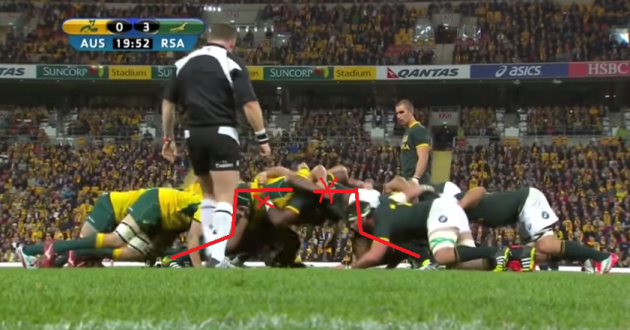
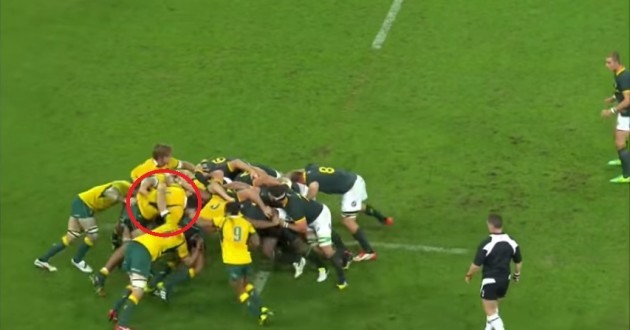
We were six scrums in by the time we had our first scrum penalty, with The Beast reminding us just why he has that nickname. While Kepu was ultimately the fall guy, the real culprit was his second row Will Skelton, who provided his tighthead with very little support on the drive.
We’ll look at the good first, which was Mtawarira’s positioning. The South African got his initial shove because of his perfect body position. In world rugby, just he and Cian Healy seem to drive so square to their tighthead, with the majority of looseheads angling into their opponents’ bodies, even just slightly.
In a dominant scrum, sometimes it can be difficult to maintain the legal body position as you move forward, with the sheer issue of balance causing you to rise, or sometimes even fall.
But the very best props can keep moving forward with a perfect 90 degree bend at the hips, and that’s exactly what Mtawarira did here.
Eventually, Kepu turns anticlockwise to halt the drive, and South Africa are correctly awarded a penalty, but as we can see below the reason for the scrum going back at such a rate may be down to lock Will Skelton, who is far too high to be providing Kepu with any real help on the drive.
The South African control was growing on the scrum, but with their front row thriving they rang the changes. Frans Malherbe came on for Jannie du Plessis, before brother Bismarck and Tendai Mtawarira were replaced by Adrian Strauss and Heinke van der Merwe on 49 minutes, with neither looking to be struggling with the pace of the game.
Initially, the subs made an impact, winning a penalty on their first scrum, largely down to van der Merwe.
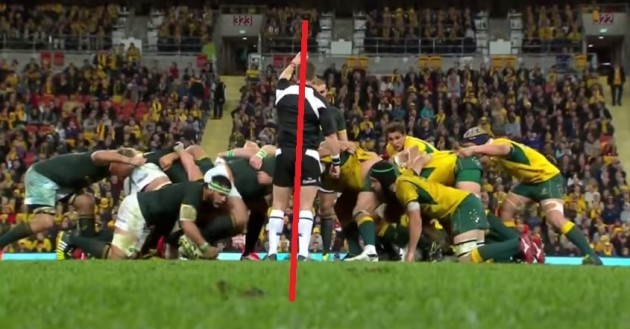
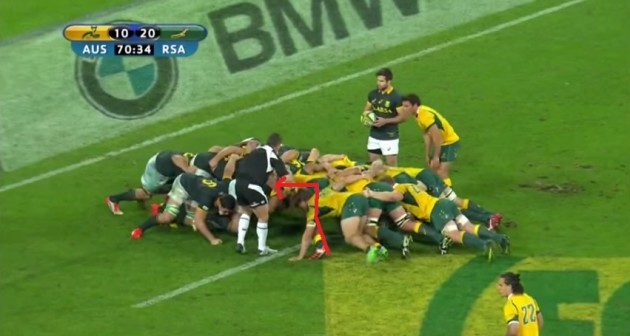
We can see below as a reference point, the starting spot of the scrum. Note the red line running through the meeting point of the front rows.
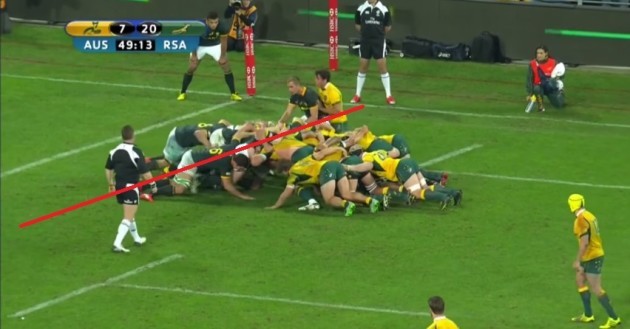
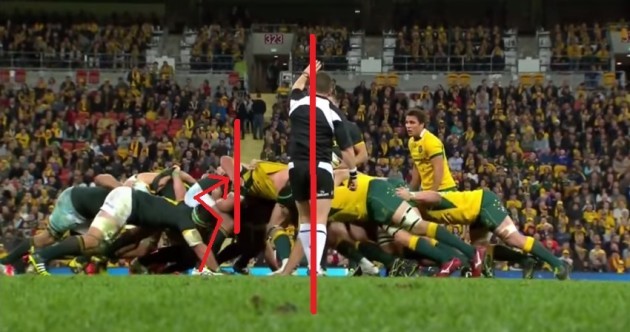
Van der Merwe gets a nudge on Greg Holmes, who replaced Sekope Kepu, and Malherbe held his position at tighthead. Australia’s lossehead James Slipper panics, and begins to turn inside in the hope of conning Nigel Owens into resetting the scrum, but as we can see below, the only forward movement comes from South Africa, with Slipper merely rotating on the spot, and the tail of the Aussie scrum whipping around.
However, all the changes made South Africa’s scrum disjointed, with the majority of the scrums that followed needing to be reset.
The biggest problem was Malherbe at tighthead, who James Slipper was beginning to get the better of.
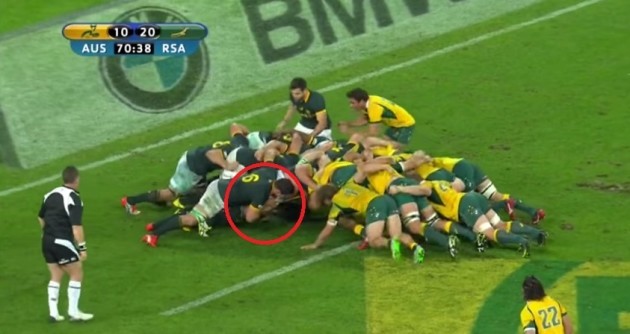
They won their first scrum penalty soon after, but Nigel Owens won’t be pleased when he looks back on the replay.
For reference, we’ll look at the position of the scrum as they set.
But before the ball is fed, Slipper drives early, and sends Malherbe on the back foot. It was a poor miss by Owens, with the scrum advancing by more than a metre on the side he was watching.
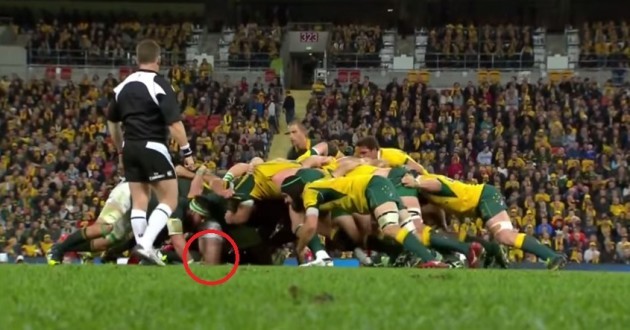
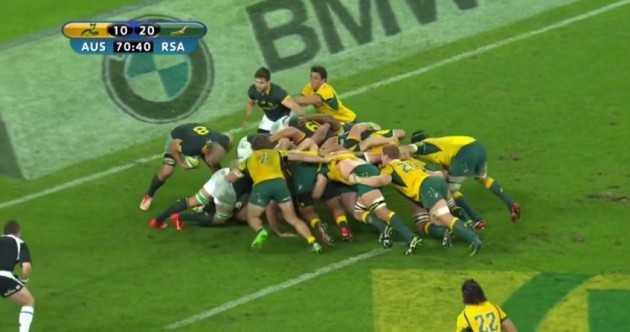
As we can see above, the knock-on effect was that Malherbe now had very little balance, with his body angled up, rendering him helpless when the second drive came on.
Once the ball as fed and Slipper drove harder, he fell to his knees, and Australia were awarded the penalty.
They couldn’t fool Owens a second time though, as Slipper was pinged for an early drive shortly after, but the Australian control on the scrum was increasing with every set down.
Scott Sio came on to replace James Slipper for the final 10 minutes, and he played a big part in the most crucial scrum of the day.
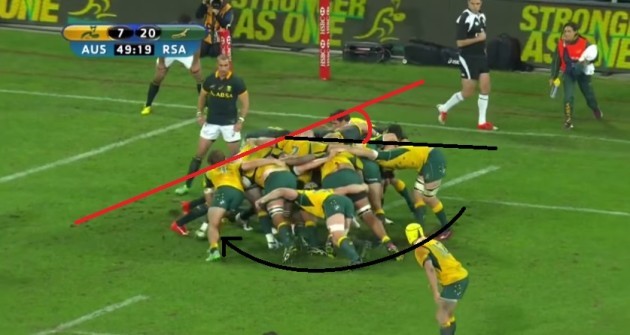
In the gif, we can see how Australia shove as a unit, before Michael Hooper pounces on Schalk Burger to force a turnover, which Hooper eventually turned into a try to bring them to within three points of the Boks.
Breaking it down bit by bit, Springboks flanker Francois Louw has a lot to answer for.
We’ll look at the set-up first, with substitute Scott Sio setting up perfectly.
When the ball is engages, Sio starts to push on strong, with Malherbe just about holding his position.
However, as we can see below, Louw inexplicably begins to push Malherbe’s right leg inwards, causing his prop to slip. When you watch it back together on the gif, you’ll really see the impact Louw’s push had on his prop’s balance.
The scrum goes down and Schalk Burger tries to get the ball out as fast as possible, hoping to avoid a penalty for the collapse. Michael Hooper is waiting though, and knocks him back over the line.
From the next scrum, a routine in and out sets up Hooper to eventually cross for a try and bring them back into the game.
It was South Africa’s scrum – earlier so dominant – that proved to be their downfall as the game wore on, and with both du Plessis brothers and The Beast seemingly still running with plenty in the tank, questions have to be asked of the switches.
The substitution by numbers approach is growing at test rugby, especially in the packs, but South Africa’s downfall is a cautionary tale for all to follow.
