THERE IS NOTHING in rugby quite like watching the All Blacks utterly transform the momentum of a game in the blink of an eye.
No one pounces on opposition errors and thrillingly punishes them as ruthlessly as the Kiwis.
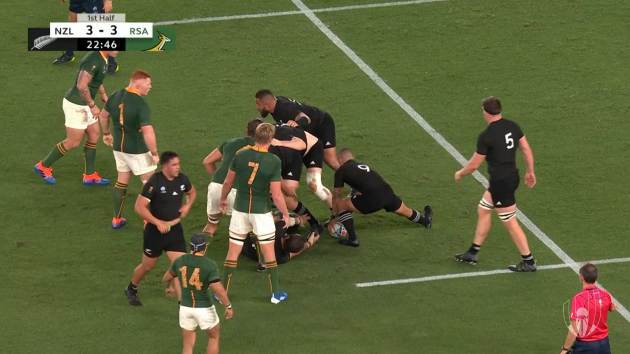
With 20:39 on the clock in yesterday’s game in Yokohama, the Springboks were in control, leading 3-0 after the opening quarter had seen them stifle and pressure New Zealand. It would have been 6-0 but for a poor penalty miss from Handré Pollard.
Then, all of a sudden, Faf de Klerk’s pass from a lineout went to ground, Richie Mo’unga hacked it ahead and the All Blacks nearly scored a try, with Makazole Mapimpi fortunate to escape a yellow card in the ensuing scramble.
With Mo’unga having popped over three points from a penalty, the All Blacks suddenly sensed that momentum shift and their stunning try just after the restart summed up the beauty of their play.
The crucial passage begins with an Aaron Smith box-kick and it’s vital to underline the importance of kicking in the All Blacks’ win over the Boks.
This try and the Kiwis’ other five-pointer, finished by Scott Barrett minutes later, both stemmed from regaining box-kicks, while we will see the importance of another kind of kick from Mo’unga very soon.
In total, the All Blacks kicked in play 30 times compared to the Boks’ 24.
Of those 30 kicks, the All Blacks directly regained five and another five resulted in errors from the Boks – a hugely successful return.
Click here if you cannot view the clip above
With tighthead prop Nepo Laulala providing an important shield ahead of the ball, Smith’s box kick is accurate in this instance.
It hangs in the air for four full seconds and lands roughly 20 metres upfield, giving the chasing Bridge a chance to compete.
The Boks would have been disappointed to let Bridge [white below] up into a one-on-one contest with Duane Vermeulen [red] here.
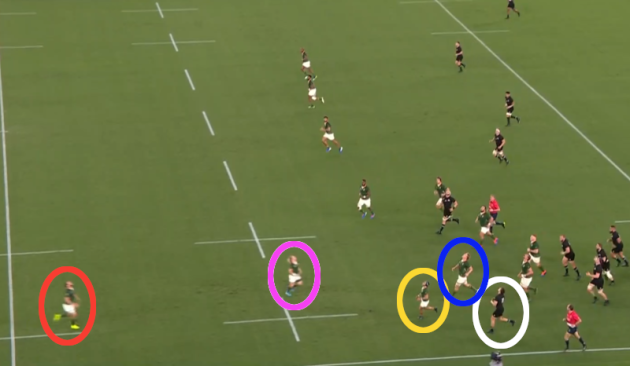
Cheslin Kolbe [yellow above], Pieter-Steph du Toit [blue] and de Klerk [pink] are all tasked with creating an obstruction for Bridge, ‘escorting’ him away from being able to get into the air.
But Bridge is clever in chopping his feet to slow himself as the ball hangs in the sky, ensuring he doesn’t collide with any Boks or arrive underneath the landing point early.
As the Kiwi wing keeps his eyes fixed on the ball, space opens up between Kolbe and de Klerk at the crucial moment, allowing Bridge to slip in between them.
Bridge leaps off his right leg and gets his left hand to the ball, which bounces back in New Zealand’s favour.
In a flash, the All Blacks sense their opportunity.
Smith urgently gets to the bouncing ball and we see the turnover mentality from Hansen’s men.
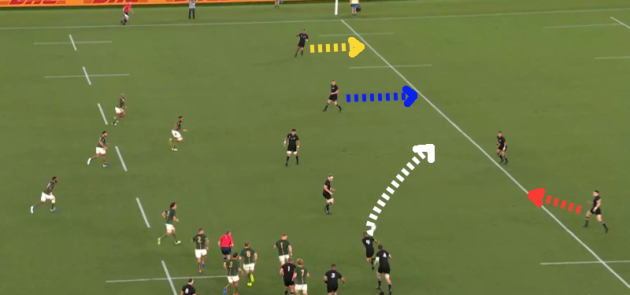
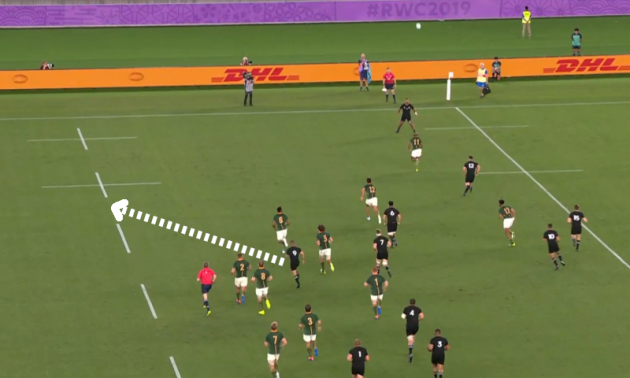
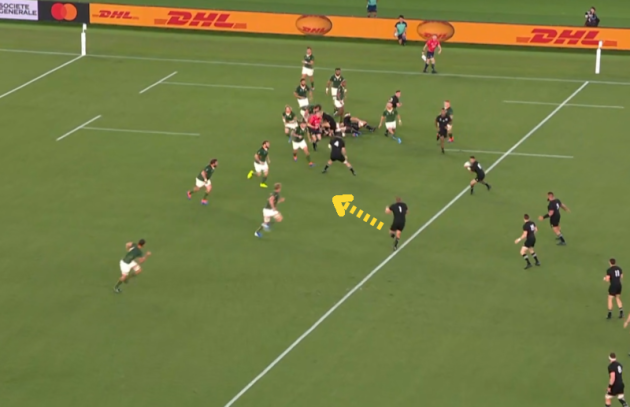
As Smith fires a beautiful pass off his left to Mo’unga [white] – the accuracy and speed of his passing is a major strength for the All Blacks – we can see fullback Beauden Barrett [red] sprinting up from the backfield to offer himself as part of the attack.
Wider out, Ryan Crotty [blue] and Sevu Reece [yellow] are furiously backpedalling to make themselves available outside Mo’unga.
It’s simple stuff, but few teams work as hard or with the same level of alertness as the Kiwis do in this kind of transition situation. They click into attack mode in a split second.
We can also see how the Boks defence reacts after losing the aerial contest.
Even in this threatening scenario, the Boks come forward with linespeed on the edge – outside centre Lukhanyo Am [yellow below] and left wing Mapimpi [white] leading it up.
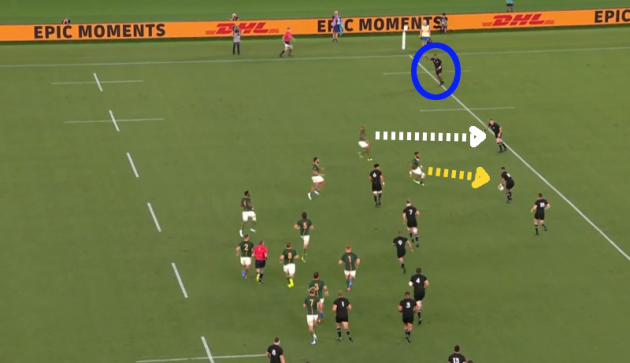
The All Blacks knew all about this defensive tendency, of course, and always had shallow cross-field kicks in mind for this game.
We can see Reece [blue above] signalling that he’s in space in this instance, and Mo’unga produces the kick to deliver the ball to him.
Click here if you cannot view the clip above
Again, it’s worth noting that this wasn’t the only kick of this kind that New Zealand used in the game – with Mo’unga finding Reece in similar style a few minutes later.
New Zealand also floated passes over the head of the Boks’ edge defender on a handful of occasions, finding the space that appears to be the weakness in the South Africans’ defensive system under Jacques Nienaber.
The Boks send their wings up at pace and often biting inwards heavily, leaving space on the edges. Often, they are excellent at recovering and tracking across to halt the attack when the opposition get into that space, but not on this occasion.
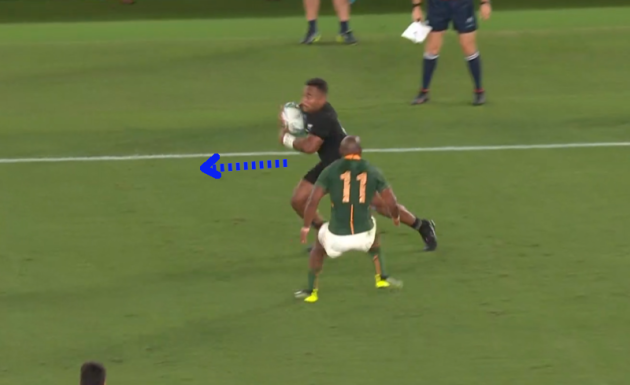
With Mo’unga’s kick slightly higher than absolutely ideal, Reece is standing still as he gathers. Mapimpi is hounding across to recover, but the acceleration from Reece to burst outside him is world-class.
Again, this is a theme for New Zealand: they possess major acceleration and top-end pace.
Beauden Barrett is one of the quickest in the game, but Mo’unga has added even more to that – as we saw for his excellent try-saving tackle on Cheslin Kolbe in the second half.
Reece and Bridge have broken into the team for more than their acceleration but they bring that in buckets too. The All Blacks’ forward pack may not have the sheer bulk of the Boks, but they too are quick and mobile across the ground, with Hansen favouring Laulala at tighthead prop over the more experienced Owen Franks, who was left out of the World Cup squad altogether.
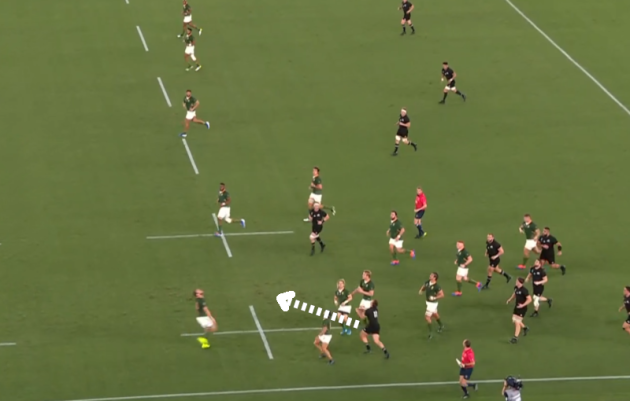
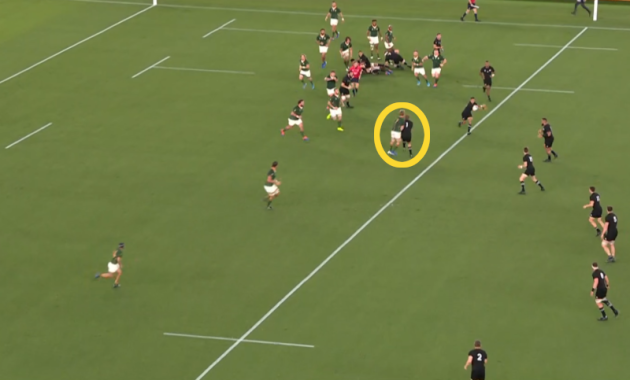
In this instance, Reece’s burst takes him clear of Mapimpi and he’s able to link back inside to Smith, who has run a sublime support line – so typical of Kiwi halfbacks.
As we can see above, Smith is taking off on his pre-emptive line even before Reece has collected the ball from Mo’unga’s kick.
New Zealand have been world leaders in off-the-ball support play for some time and while this is now accepted as a basic for any scrum-half, it’s superb work-rate and anticipation from Smith to be in the perfect position to support Reece.
Click here if you cannot view the clip above
There appear to have been some complaints about Reece’s pass inside to Smith here, but the fact that Reece is stopped in the tackle of Handré Pollard just after passing makes it look bad.
Had Reece continued running upfield after passing, there would likely have been no comment at all. The match officials are content with this one and it’s very difficult to argue with them.
Smith receives the ball from Reece and rapidly moves it on to Ardie Savea, sensing that Siya Kolisi is behind him to make a tackle. It’s a clever decision from Smith and rewards the excellent work-rate of Savea, who was sensational in this game.
Savea has burned past the retreating Kolisi and Franco Mostert to get into support and he then beats the tackle of Boks fullback Willie le Roux before de Klerk and Kolisi put him to ground.
Numbers on backs mean nothing when the All Blacks are in transition like this, underlined by Smith’s sharp clearout after Savea is tackled.
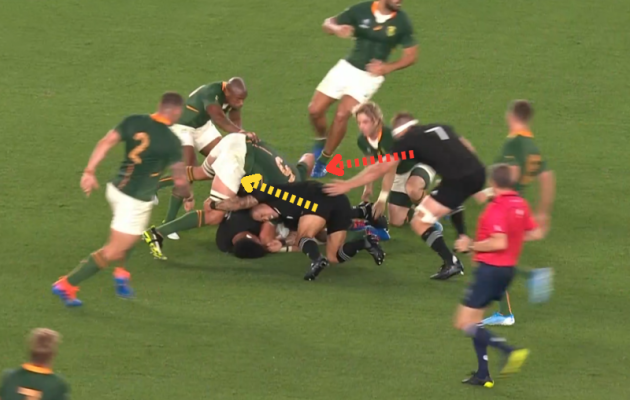
As we can see above, Mostert has got back and is in a threatening position looking to slow or steal the ball. Smith [yellow] dips in low and drives into Mostert, doing enough to prevent him from getting onto the ball before Sam Cane [red] surges in to complete a rapid clearout.
Keen to work with lightning-quick ball, Crotty arrives in to play halfback, firing a pass off to the left immediately.
We see some of the intelligence of the All Blacks forwards next, as Sam Whitelock [red below] runs the first decoy line close to the ruck, attempting to interest some of the Boks’ interior defenders.
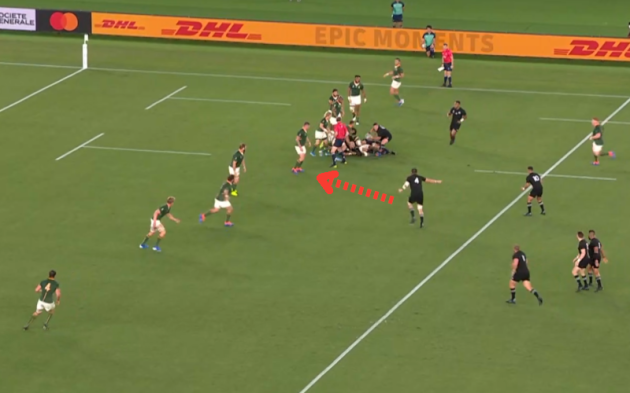
But Whitelock is simultaneously pointing for Crotty to pass to out-half Mo’unga in behind him, aware that the opportunity is wider out.
As Mo’unga receives from Crotty, loosehead prop Joe Moody [yellow below] is running a second decoy line, similar to Whitelock’s.
Moody’s line is crucial here, as it draws in Pieter-Steph du Toit, removing a Boks defender from the already demanding defensive equation.
Again, du Toit’s defensive aggression works against the Boks, as their defence is already majorly stretched before the flanker commits inwards and gets bounced by Moody.
Mo’unga has already passed in any case and here we see an example of the value of the 10-15 combination between himself and Barrett.
Barrett is slightly further outfield than would be the case if he was at 10, allowing him to use his decision-making and evasion skills in more space.
In this case, there are acres of that space.
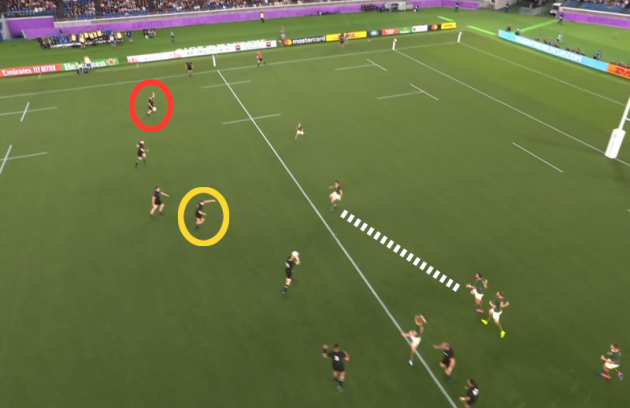
With the Springboks defence naturally very narrow after the initial break up the right, and du Toit having bitten up and in on Moody, there is a big gap between tighthead Frans Malherbe and lock Eben Etzebeth [white above].
The All Blacks, to their credit, have retained great width and we can see hooker Dane Cole [red] signalling for the ball out wide. Coles even has another player outside him in centre Anton Lienert-Brown. It’s a huge overlap.
But Bridge [yellow above] is pointing the way for Barrett, signalling the space in front, and the Kiwi fullback uses his pace to get outside Malherbe, turning Etzebeth in and freeing space for him to offload to Bridge to seal the deal.
Click here if you cannot view the clip above
It’s a supreme bit of transition attack from the All Blacks, with just 27 seconds between Bridge getting his left hand to Smith’s box kick and the wing dotting down at the end of a wonderful team try.
While not every player touches the ball, each plays an important role.
This lightning-quick attack was at the centre of a magnificent passage of New Zealand play that left them 17-3 to the good with 27:54 on the clock – a rapid turnaround that essentially won them the game.
No one does it like the All Blacks.