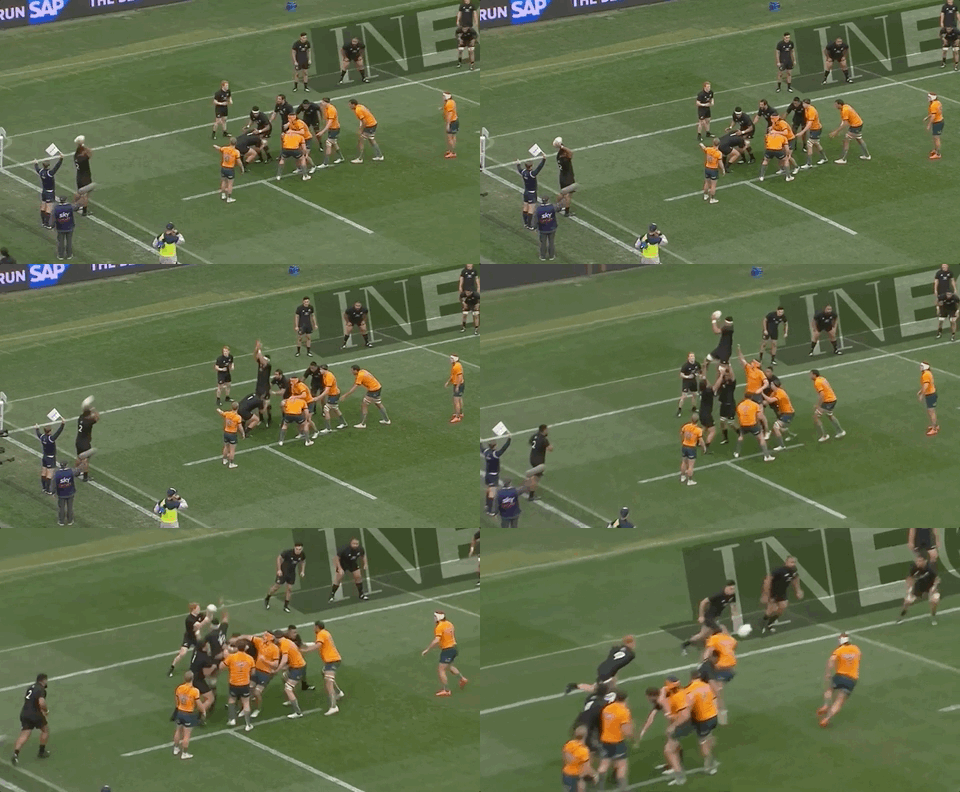
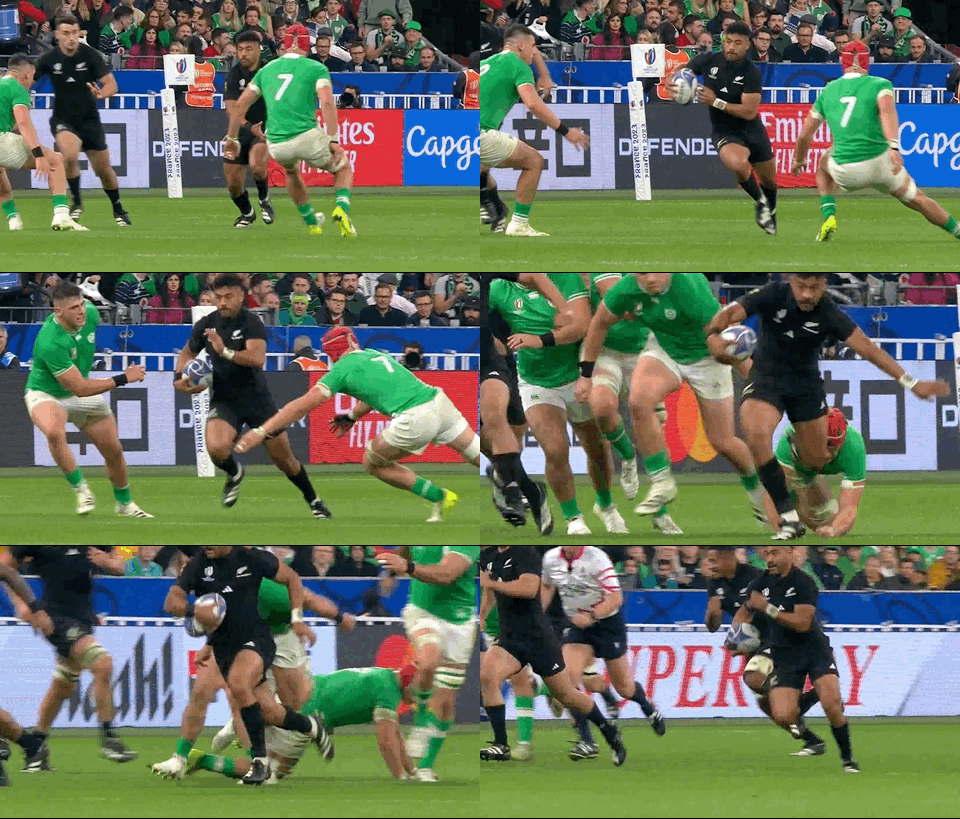
WHEN THE ALL Blacks use four-man lineouts, it’s generally only on their own five-metre line or close to it.
With pressure on near their tryline, they like to reduce the lineout options and beat the opposition with their speed of movement or speed of jump.
We get an example of that below.
It’s a clean, uncomplicated win and allows the All Blacks to set up for an exit kick.
Generally speaking, we don’t see teams use four-man lineouts as an attacking platform too often, mainly because the extra bodies out in the backline can actually clog things up. More commonly, teams will attack off seven, six, or five-man lineouts.
The All Blacks are the same – they rarely use four-man lineouts as an attacking platform when they’re outside their own 22.
But they used a four-man lineout play to devastating effect against Ireland on Saturday night to score a try that Andy Farrell’s men will likely view as having been too easy for the All Blacks, who are lethal when you give them a sniff.
Ireland’s defence on this occasion allowed them that sniff and the All Blacks took their chance in characteristically clinical fashion.
In the last two years, the Kiwis have used a four-man lineout as an attacking platform just once. So in the 19 games before they took on Ireland, they only attacked off a four-man lineout on one occasion.
This was back in July against South Africa in the Rugby Championship.
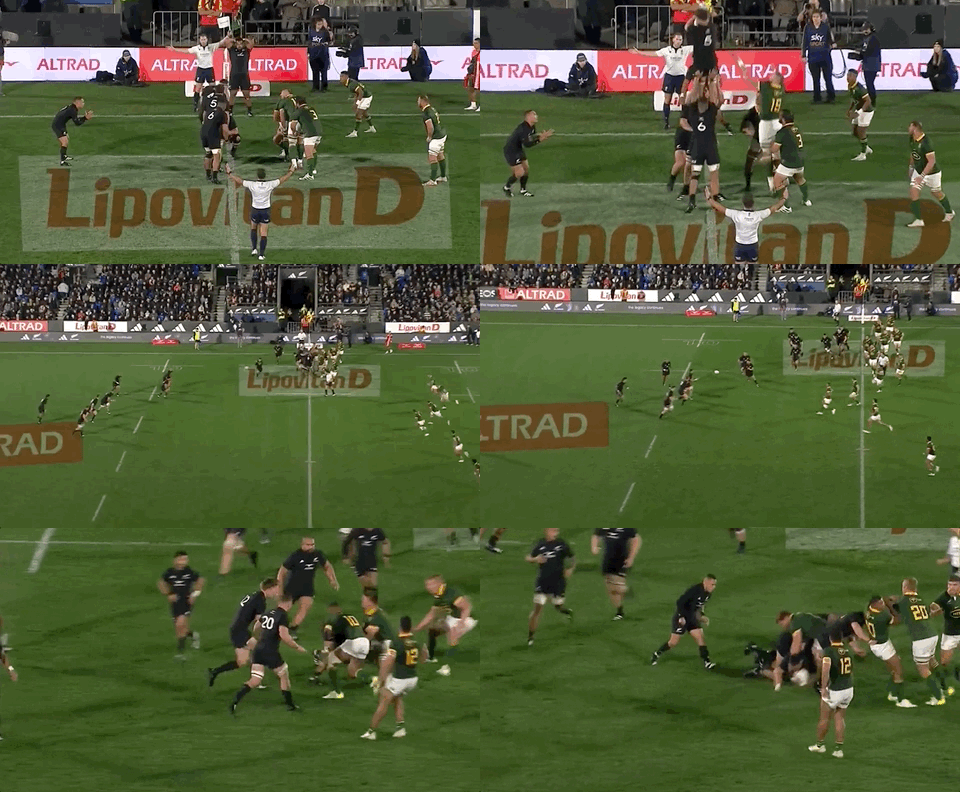
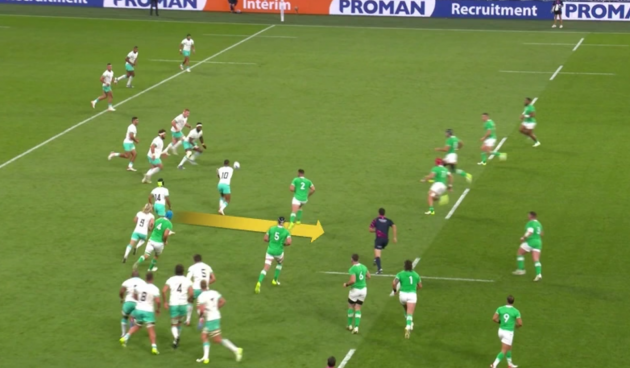
They play off the top, scrum-half Aaron Smith passes to out-half Richie Mo’unga and he hits back row Shannon Frizell for a midfield carry.
The All Blacks are essentially setting up a midfield ruck here, then they play another phase around the corner before bouncing back to their left, where they actually make a linebreak thanks to some slick handling.
There are a couple of things to note in the first phase. Firstly, what a four-man lineout means for the defence. Obviously, a few of the forwards have to defend as part of the backline 10 metres back.
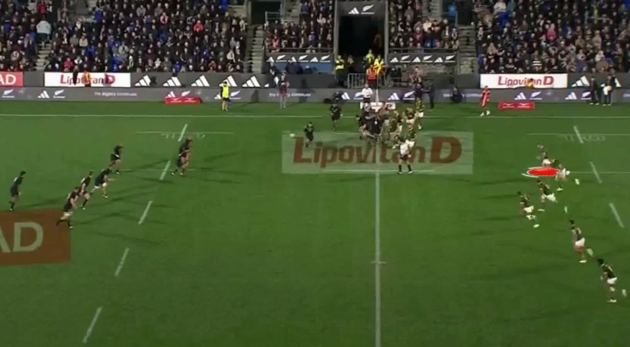
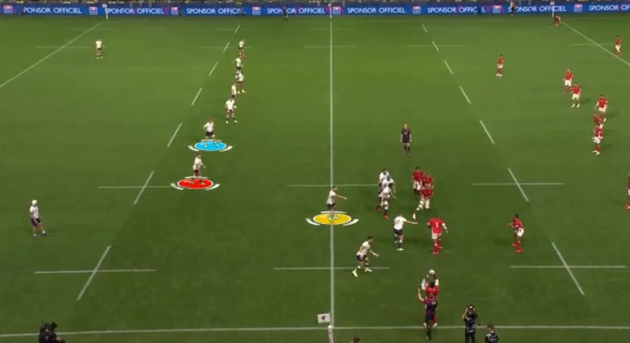
Crucially, one of the front row forwards usually goes there, given that you need at least two defensive jumpers in the lineout. So in this case, the Boks have hooker Malcolm Marx [red below] as the first defender 10 metres back from the lineout and just beyond the 15-metre line.
Again this is a generalisation, but front rows aren’t quite as quick or agile as other players, so it’s not really ideal having them in the defensive line.
In this instance, Marx is not pushed to do anything as the All Blacks simply pass into midfield.
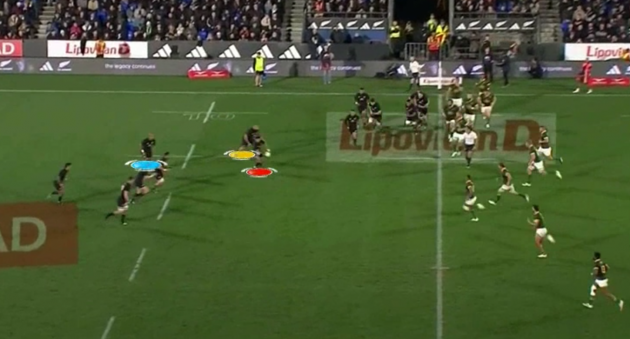
Before we move on, though, it’s worth noting the pieces around Kiwi out-half Mo’unga [red below].
On his inside shoulder is tighthead prop Nepo Laulala [yellow], while blindside wing Mark Telea [blue] is bouncing infield behind two Kiwi back rows and inside centre Jordie Barrett.
It’s not hugely threatening for the Boks defence, but the Kiwis do strike two phases later.
So this is the only example of New Zealand attacking from a four-man lineout in the last two years. With that in mind, it seems highly unlikely that Ireland would have spent time looking at this single, isolated example ahead of last weekend.
Ireland don’t have to defend against many attacking four-man lineouts very often for the aforementioned reasons but funnily enough, there were two examples in their pool stage games against South Africa and Tonga.
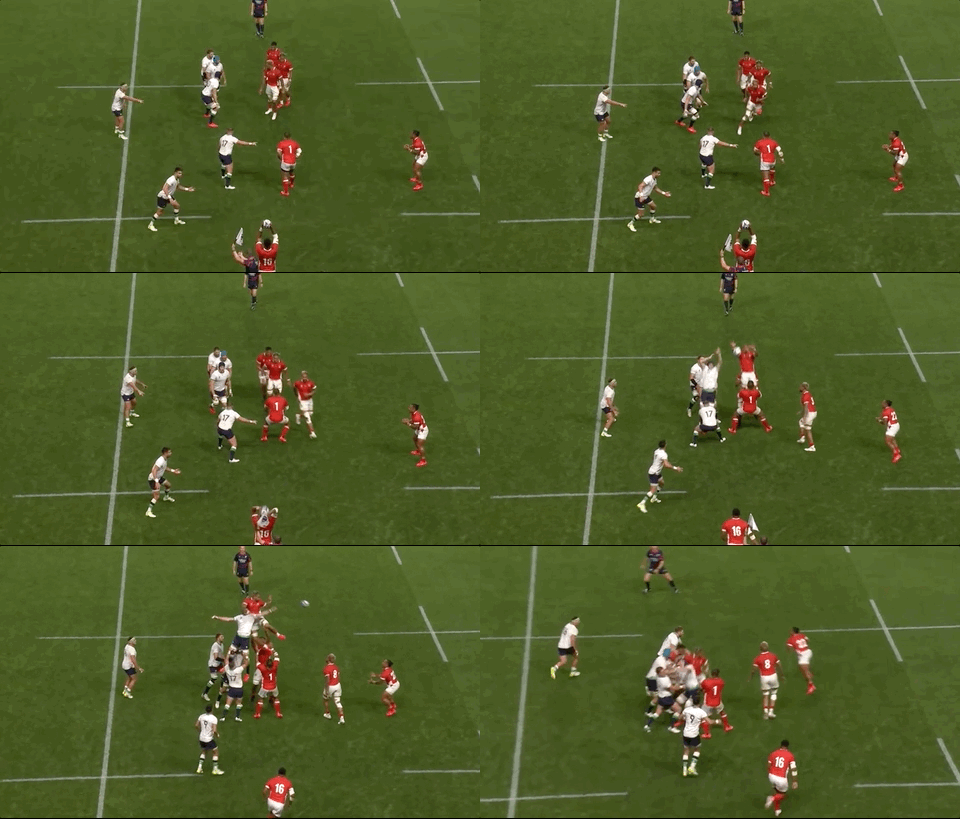
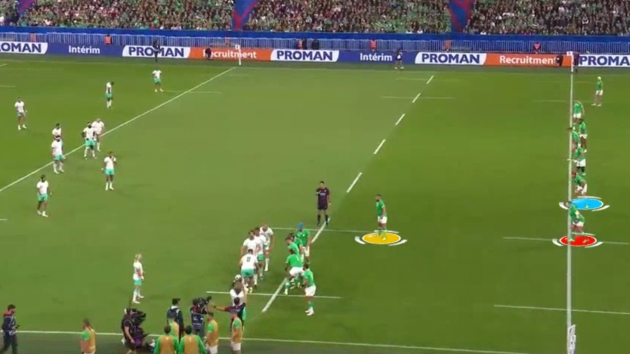
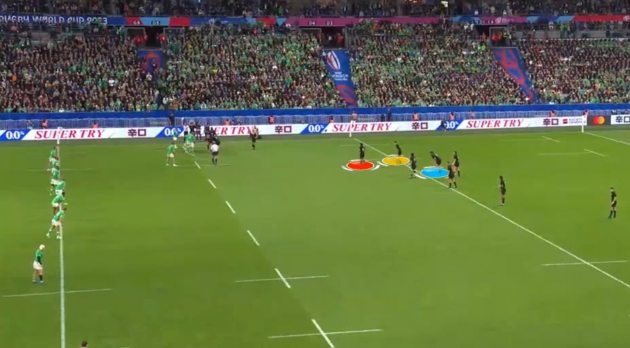
As we see below against Tonga, Ireland put tighthead prop Tadhg Furlong [red below] into that spot just beyond the 15-metre line as part of the backline defence.
Flanker Josh van Flier [blue above] is just outside Furlong in the defensive line, while hooker Rob Herring [yellow] is the ‘tailgunner’ in the lineout and will look to break out over the 15-metre line once Tonga pass the ball from the lineout.
Tonga play the ball off the top of the lineout to scrum-half Sonatane Takulua.
And we can see how the Irish defence responds, with Herring moving to get out beyond the 15-metre line as van der Flier races forward off the defensive line.
We can already see above that the linespeed of van der Flier and others outside him means Furlong is getting a little left behind.
As it turns out, Takulua plays a clever inside pass to number eight Vaea Fifita at a late stage, catching Ireland off guard.
Furlong tries to turn in to tackle Fifita in that space behind the lineout, but the Tongan is moving at speed and evades him before knocking the ball on as opportunity beckons.
It’s a clever planned play from Tonga that doesn’t give them the reward it deserves.
New Zealand would certainly have noticed Ireland’s defensive set-up here.
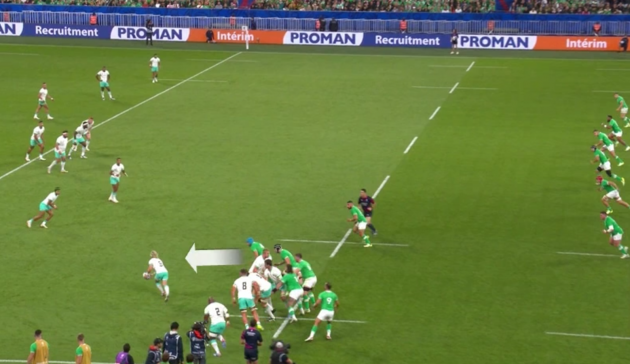
They would also have noticed it against South Africa as the Springboks played off a four-man lineout. Furlong [red below] is in the same spot as against Tonga, with van der Flier [blue] just outside and hooker Rónan Kelleher [yellow] as the tailgunner.
The Boks play off the top at the front of the lineout and into midfield for a carry by back row Siya Kolisi.
But what happens around the back of the lineout is what would have interested the All Blacks again.
Tadhg Beirne, who is the back-most Irish forward in the lineout, races forward in a bid to pressure scrum-half Faf de Klerk.
De Klerk gets the ball away and we can see that Furlong [red below] has been left behind by Ireland’s linespeed again.
It actually appears to be by design, with the intention being for Kelleher to connect with van der Flier outside him to create the defensive line, while Furlong plugs space in behind.
The image above also shows us how much distance there is between Kelleher and Beirne on his inside, as well as van der Flier on his outside. It’s always a challenge for a tailgunner to connect defenders on either side but these are big spaces.
Indeed, it’s not hard to see how a late inside pass from Boks out-half Manie Libbok to blindside wing Kurt-Lee Arendse might have sent him into space.
While the Boks play into midfield here and concede a turnover to Ireland, the All Blacks were clearly intrigued by the possibilities.
And so, they pulled their four-man attacking lineout out of the playbook and made a couple of tweaks.
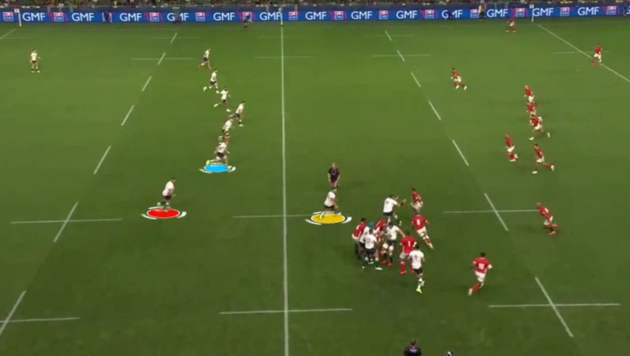
The crucial point is that Mo’unga [red below] now has blindside wing Will Jordan [yellow] in position to give him the inside pass option, while tighthead prop Tyrel Lomax [blue] is out in the midfield.
Whereas in the very first example, Laulala was not a threat inside Mo’unga, now there really is a threat with Jordan there. Also, note how close to the 15-metre line Mo’unga starts – he wants to go at this vertical space.
As for Ireland, their defensive set-up is the same as before.
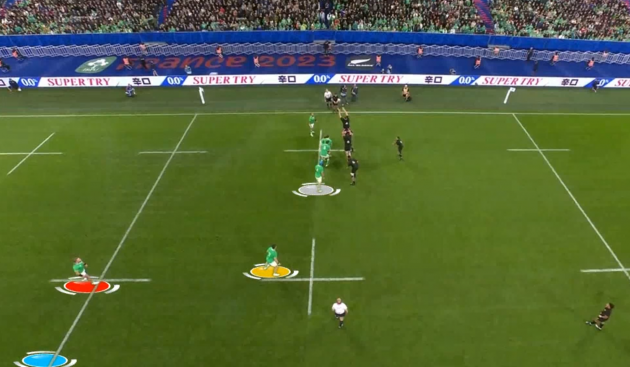
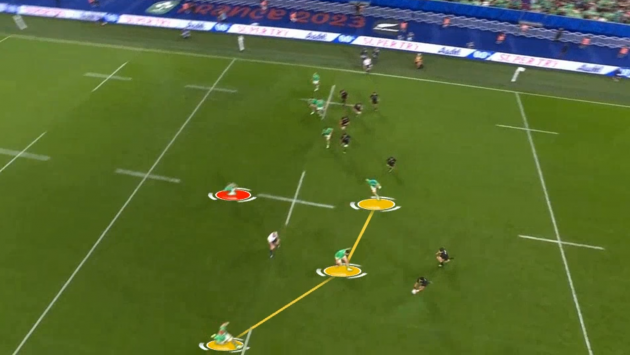
Finlay Bealham, having replaced Furlong, is in that slot just over the 15m [red below], with van der Flier outside [blue, just off screen here] and hooker Dan Sheehan [yellow] as the tailgunner. Beirne [white] is at the back of the lineout itself.
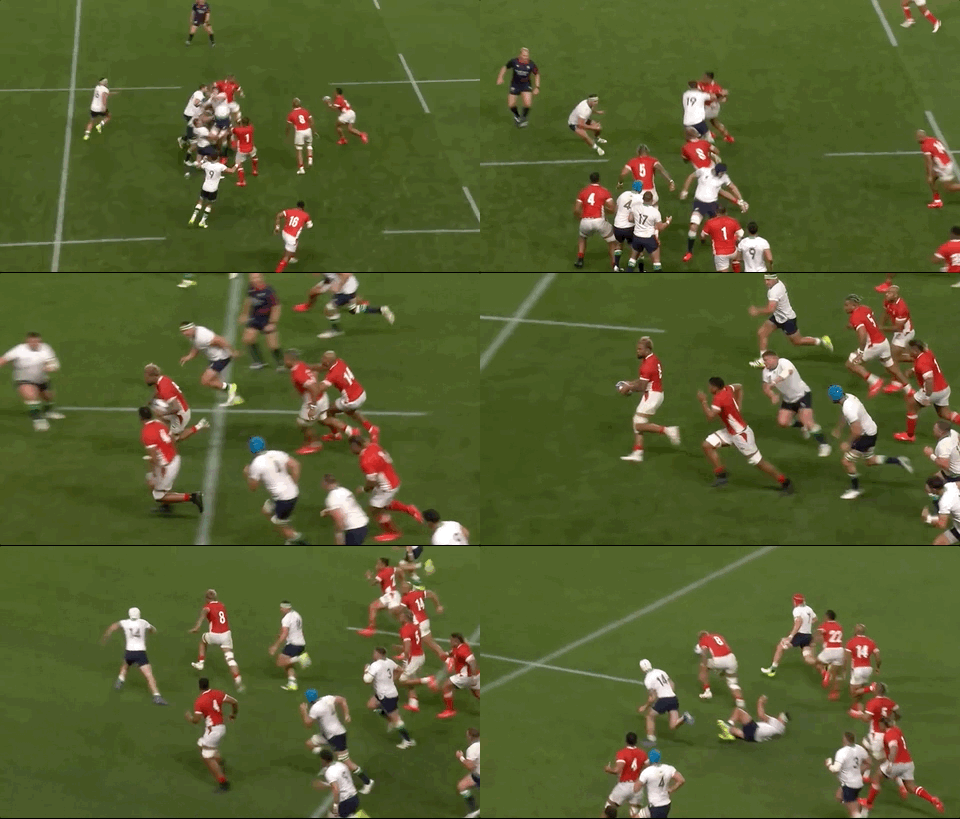
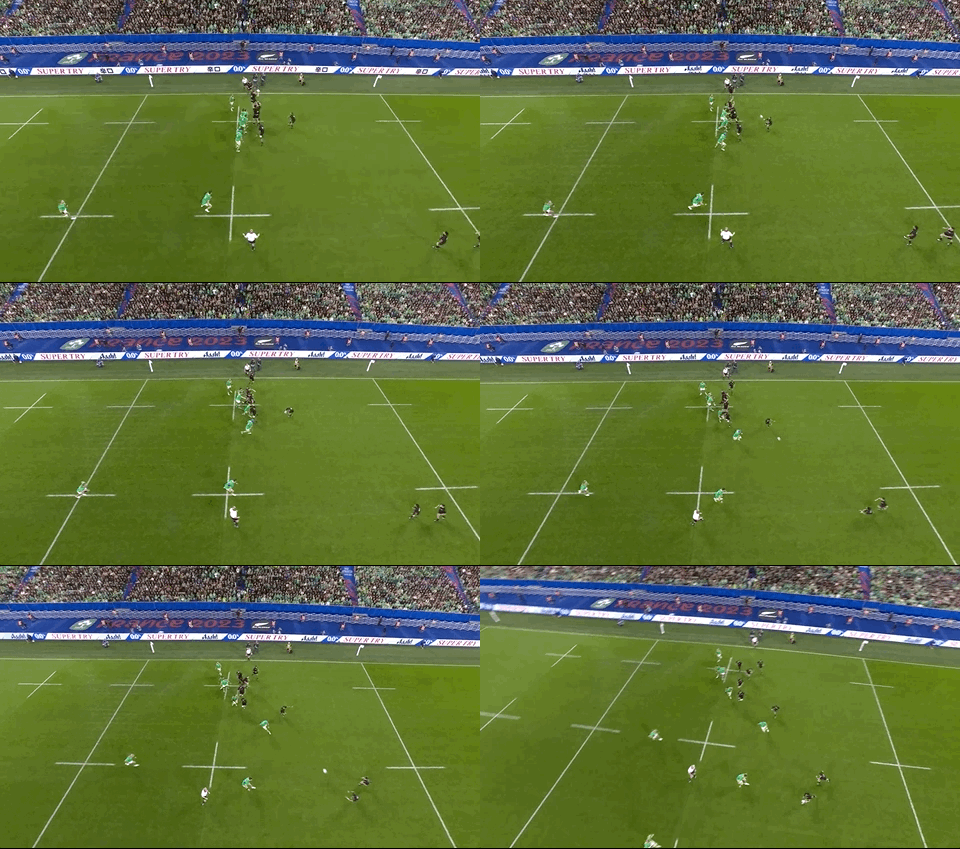
The All Blacks play off the top and firstly, Smith’s pass is key.
He fizzes the ball to Mo’unga, getting it into his hands early, but also inviting him to run onto the ball and on an infield angle, which immediately starts to get Mo’unga to the outside of Sheehan.
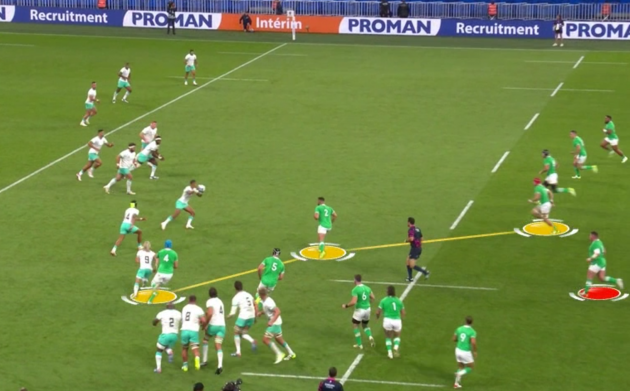
Ireland’s defence initially reacts in the same way as before, with Bealham left behind by the linespeed from van der Flier outside him.
Again, it seems to be intentional here, with Bealham [red below] seemingly tasked with plugging that space in behind Sheehan, who is hoping that the connection with Beirne inside and van der Flier outside forms [as highlighted in yellow].
But Ireland are already in trouble here, with Smith’s pass having kick-started the opportunity for New Zealand.
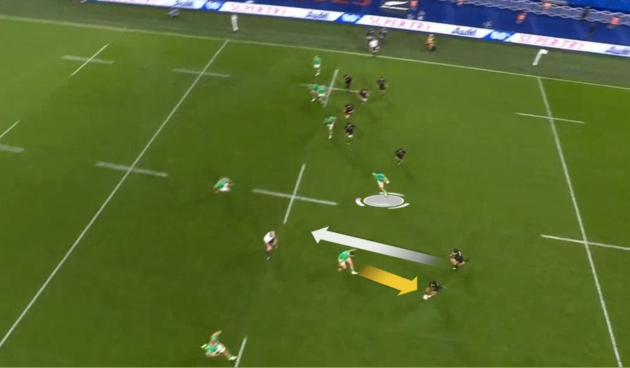
Jordan is lurking on Mo’unga’s inside shoulder and while Sheehan is initially hoping to get to Mo’unga to tackle him [yellow below], he now starts to worry about the inside pass to Jordan and whether Beirne [white] will get to the Kiwi blindside wing.
As Mo’unga accelerates, he magnifies the worry for Sheehan by dummying a pass back inside to Jordan, inviting Sheehan to sit off Mo’unga.
Meanwhile, van der Flier has raced up off the defensive line but he’s initally concerned with the forwards in front of him in the Kiwi attack [blue below].
The powerful Ardie Savea and Lomax are both running hard lines outside Mo’unga.
Bealham [red above] has essentially moved forward along the 15-metre line towards Sheehan’s inside shoulder to cover that space, so he’s not filling space in the ‘seam’ in between Sheehan and van der Flier either.
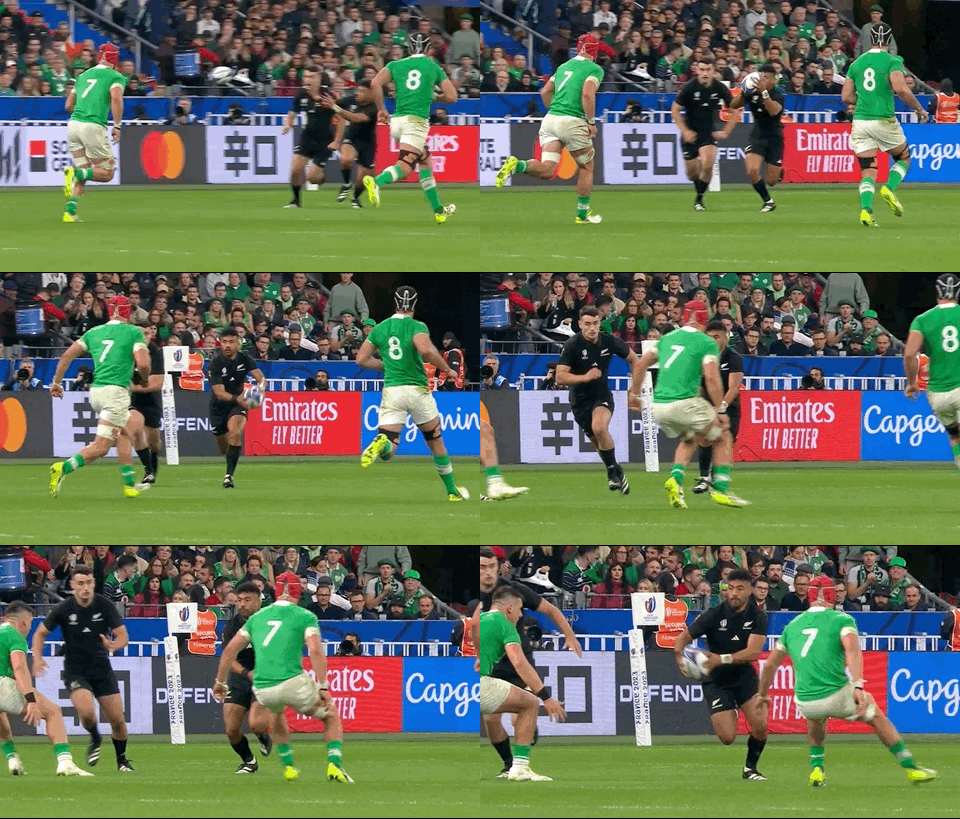
So Mo’unga cleverly takes full advantage after dummying to Jordan by straightening up as he accelerates up to top speed, bursting through van der Flier’s despairing tackle attempt as he turns back in late.
It’s the kind of linebreak teams have nightmares about giving up to the All Blacks on first phase, given how clinical they are one they’re in behind the line.
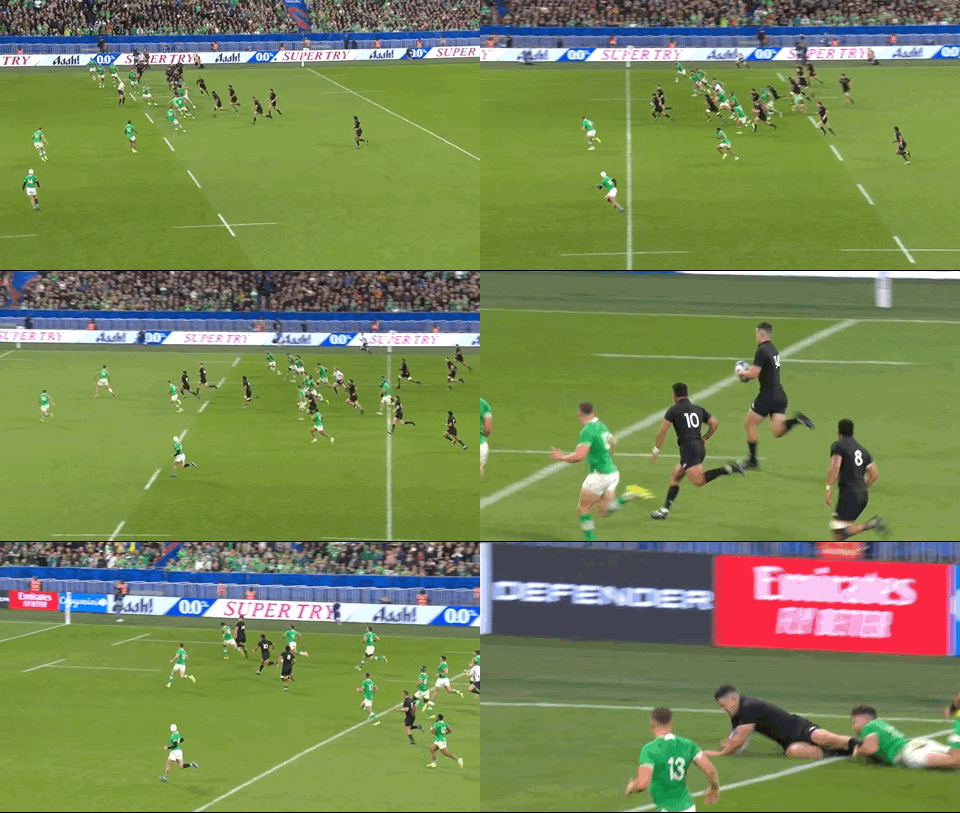
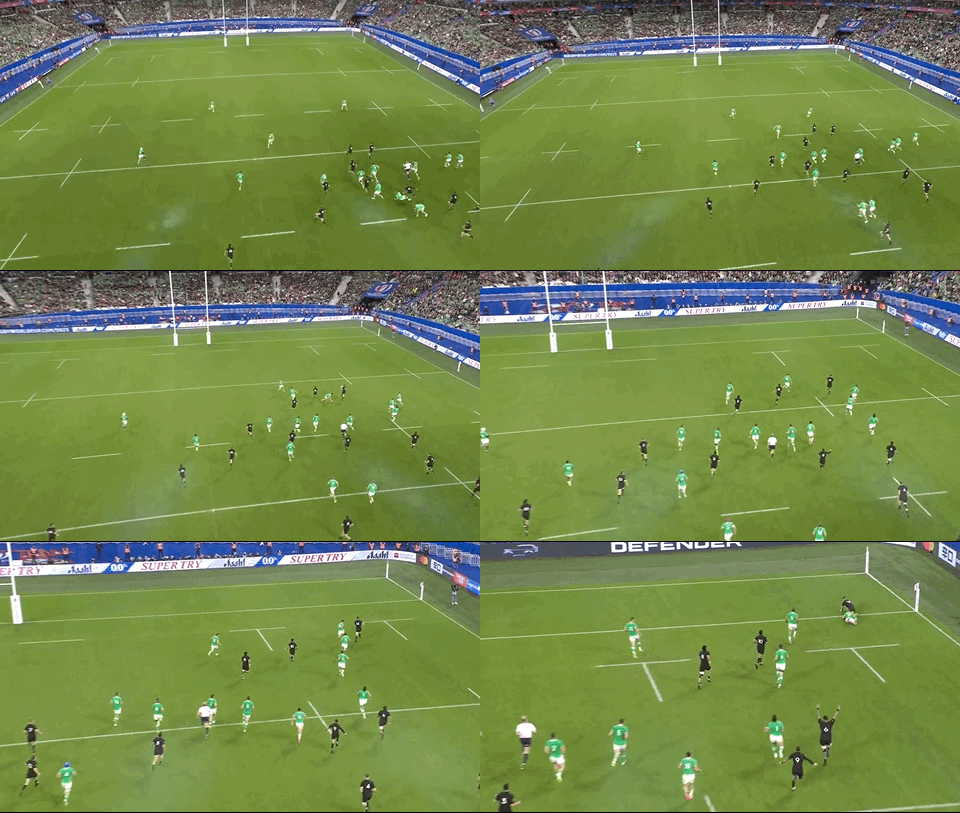
And the Kiwis duly convert here as Mo’unga’s searing pace takes him 30 metres upfield before he frees Jordan to finish.
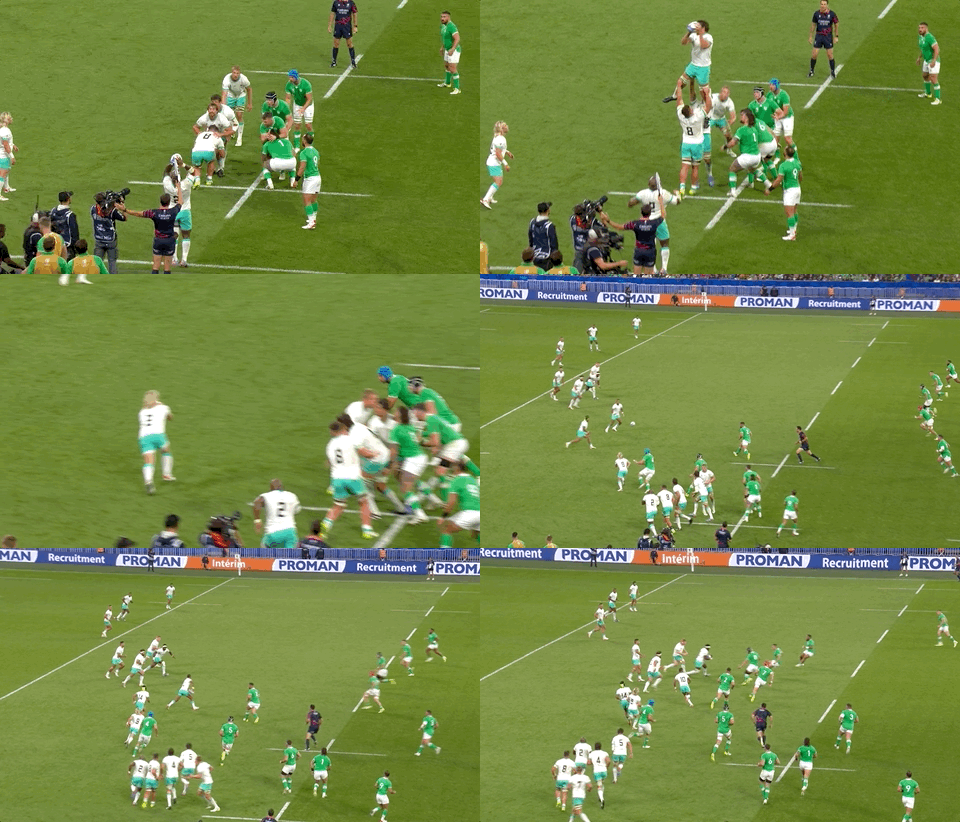
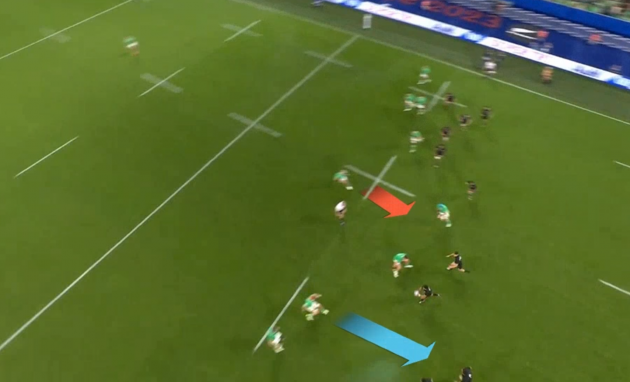
The reverse angle allows us to appreciate how valuable Mo’unga’s speed is here.
Watch how Lowe initially backs off, actually running backwards towards the Irish tryline in the hope that either Garry Ringrose, Hugo Keenan, or Jamison Gibson-Park might be able to race back and make it a 2-on-2 situation.
Mo’unga is just too quick, though, and the same applies to Jordan, who is able to sprint clear of Gibson-Park and finish despite a last-ditch effort from Keenan.
It’s a brilliant Kiwi try and would have been deeply satisfying after they put time into it in the build-up. When these things come off, it gives teams a sense that it’s their night.
“We practised that throughout the week,” said Mo’unga of this score. “The move wasn’t actually made for me, it was made for Will Jordan on the inside and I saw the two defenders hold on him because obviously he’s a big threat at the line.
“I was able to get through and thank God it happened that way because I wouldn’t have had the wheels to finish that thing off. Luckily I gave it away to the speed, which was a good way to finish. And it became pretty crucial in the end.”
Ireland were also well aware they had been stung.
And they only needed one guess as to who had been behind this crucial, clever play that picked out a potential weakness in their defence and ruthlessly exposed it.
Joe Schmidt.
“They scored off a four-man lineout, he’s very good at those set-piece plays,” said Paul O’Connell.
It was brilliant play from the Kiwis as they showed their smarts, skill, and pace, but it’s a defensive scenario that Ireland would love to plan for again. Giving up seven points on first-phase from a 60-metre lineout was very damaging in Ireland’s bid for a semi-final.


