A SEVENTH CONSECUTIVE win has Munster fans dreaming and there are certainly clear reasons for the growing optimism.
Having struggled last season, the southern province are a different beast in 2016/17. It’s definitely fair and true to put their current form down to the motivating effect of Anthony Foley’s death, but the players and coaching staff themselves also deserve credit.
Director of rugby Rassie Erasmus has added a clear focus on performing the basic skills superbly, while his assistant Jacques Nienaber has made an impressive impact defensively. With Felix Jones pushing the Munster squad skills-wise and Jerry Flannery leading an impressive scrum, the province is in a good place.
They will not be getting carried away with their current run of form, but the players look focused and hungry to improve with each passing week.
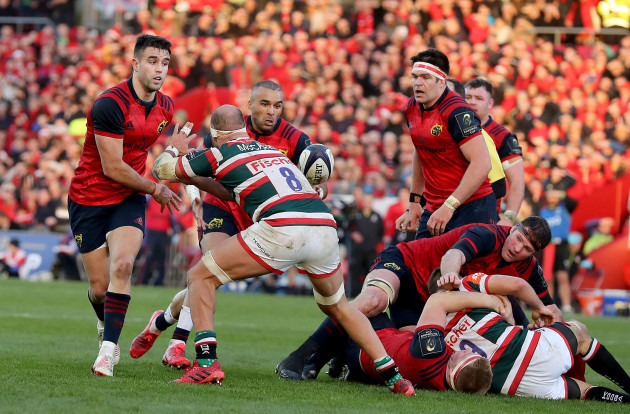
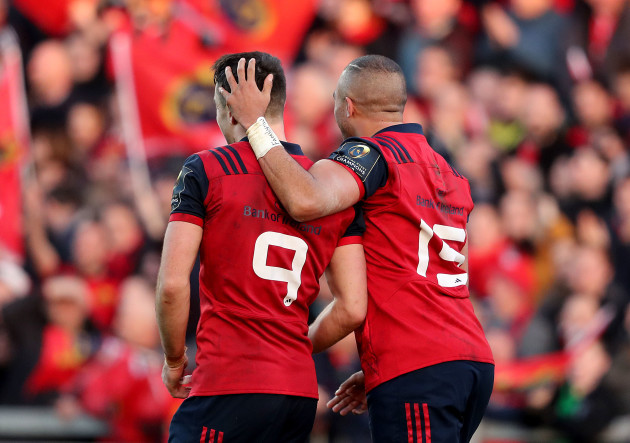
The 38-0 win over Leicester on Saturday included many highlights, but it was Simon Zebo’s first-half try that stood out as the finest example of the collective effort from Munster.
This score included so much that is good about Munster right now: aggressive rucking, explosive ball-carrying, accurate decision-making, sharp passing, directness and an intelligent subtle edge.
All of those things are being produced with technical excellence and a relentless work rate.
Conor Murray’s inside pass to Zebo stole the limelight, but this passage of attack saw every single Munster player on the pitch contribute, whether through holding width, passing, carrying, clearing out, communicating or beating defenders.
It’s a score that the coaching staff and players alike would have deeply enjoyed.
Munster’s attacking game at present is very direct and confrontational, but that doesn’t mean it’s predictable or simple. There are important wrinkles in how they go about cutting teams apart and the most exciting thing for Erasmus is that he will feel they can continue to develop even more variety.
But even without that impending development, Munster are in a fine place and this try is typical of their current efforts.
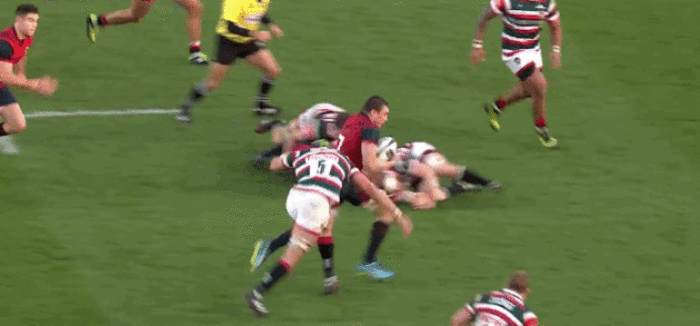
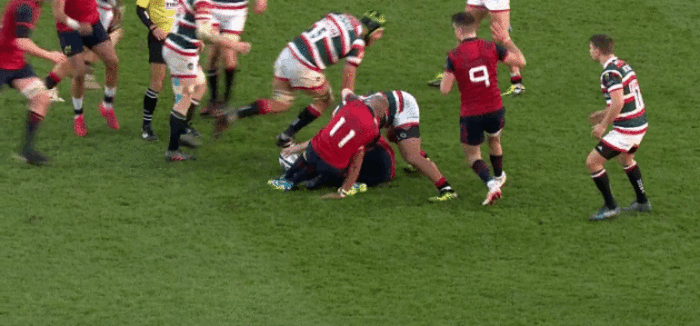
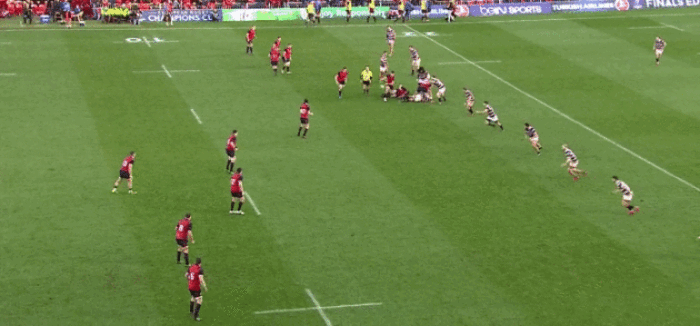
* The GIFs below will only loop in The42 app on mobiles or tablets, and not in the desktop website.
Phase 1
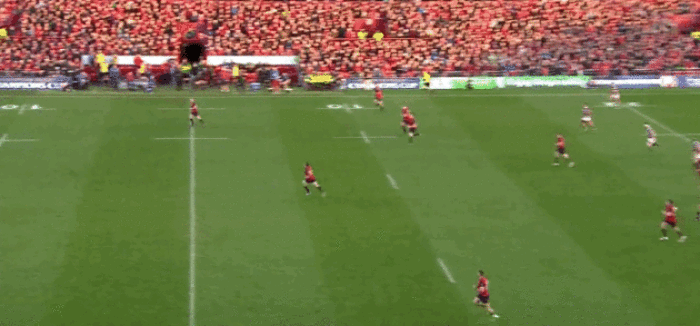
A missed penalty from Tyler Bleyendaal gives Leicester a chance to clear the ball from their 22 as they trail 12-0, with Freddie Burns launching his restart as deep into Munster territory as possible.
Murray fields and immediately finds fullback Zebo, who searches for a breaking opportunity but has to settle for carrying straight at a well-organised Tigers chase.
Every fullback in the world looks for chances to break on kick return, but sometimes the best option is to simply carry and set up an attacking ruck. Indeed, some sides operate with this tactic as a rule of thumb, providing retreating players with a clear target.
Phase 2
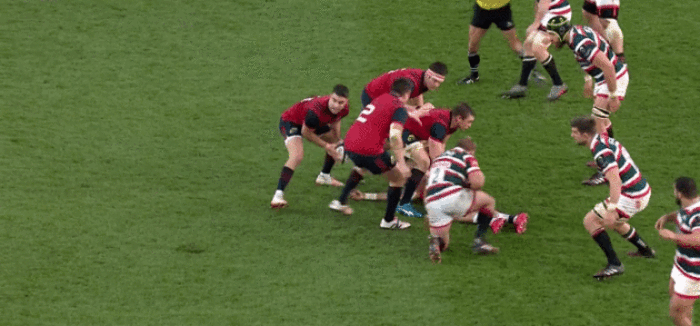
Immediately, we see Munster’s focus on attacking the fringes of rucks, as first receiver Tyler Bleyendaal finds CJ Stander with an inside pass.
The out-half is someone who consistently challenges the defence with ball in hand, which has obvious advantages to those around him.
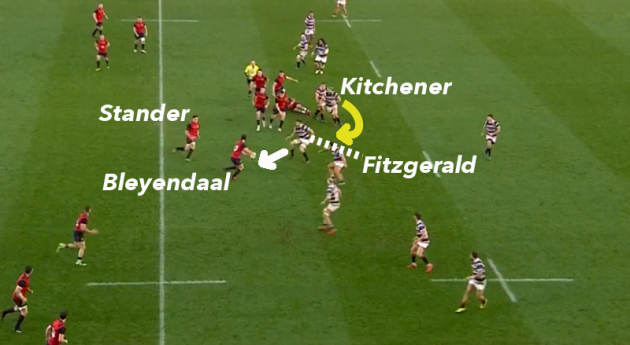
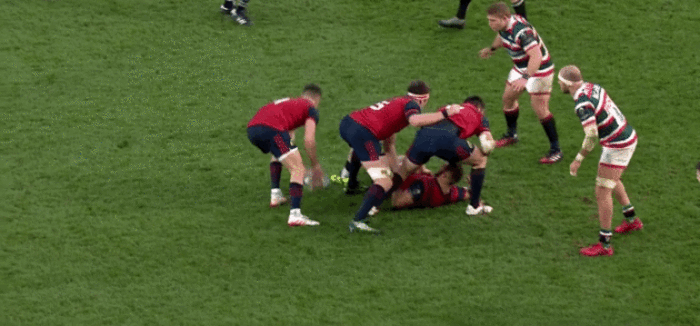
We can see here how Bleyendaal’s running line straight up the pitch, with his hips square to the posts, drags Michael Fitzgerald out from his initial pillar position to the right of Munster’s ruck.
The white arrow above indicates how Fitzgerald is lured onto the threat of Bleyendaal, even though prop Ellis Genge just outside him should be in position to tackle Bleyendaal.
The yellow arrow indicates Graham Kitchener’s run from left side of the ruck, as he arrives over to help plug the hint of a gap on Fitzgerald’s inside shoulder.
The lock and blindside flanker combine to tackle Stander, but it’s good gainline progress for Munster and Stander fights well on the ground to present clean ball for Murray to move away.
Phase 3
Now we see Munster look to exploit the Tigers on the outside edge. While Erasmus’ side are very direct in attack, they always attempt to hold width and players like Bleyendaal, Rory Scannell and Ian Keatley – as here – allow them to move the ball to the touchlines.
It appears that Keith Earls on the left wing is expecting a kick down the tramlines to chase, meaning he gets very flat. Therefore, he has to stop and retreat to catch the looping pass, but his reaction is brilliant.
Keatley does his best to help Earls as the wing cuts back inside, just planting his feet and holding his ground when he realises that he can impede Brendon O’Connor.
It’s a tiny thing, but moments of shepherding, tracking or escorting like this are signs of a team playing for each other, with players actively looking to make their team-mates’ lives easier.
O’Connor can’t get through to Earls and the wing then shows off his sublime footwork to completely flummox Logovi’i Mulipola.
Earls glides up into the air as he runs an arcing line away from the touchline, landing hard on his right foot to power in towards Mulipola’s right shoulder, sitting the prop down in the process.
But within a split second, Earls has powered off his left foot to burst back to Mulipola’s right, with a rapid swat of Earls’ right hand aiding him in beating the tackle.
He finds his feet rapidly and accelerates forward, immediately taking note of Tommy O’Donnell’s position to his right and lining up the offload. It all shows the pace at which Earls’ attacking mind works; the thought-process barely even being conscious.
Key to Earls’ offload is how he releases the ball from beyond the tackle point to a team-mate who is clearly open. In fact, Earls is offloading and falling to ground even before the tackle is initiated by Fitzgerald and O’Connor, meaning they are both taken to deck with Earls.
O’Donnell’s excellent support line is rewarded as he catches on his left shoulder and then gets hauled down from behind by Kitchener.
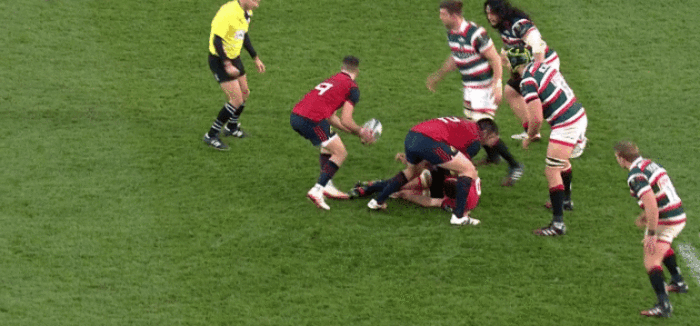
Next up, we see some discipline from a Munster player, as Murray arrives first to the breakdown, with Manu Tuilagi threatening over the ball.
Murray has to leap over O’Connor on his way to support O’Donnell and his arrival is not through the gate.
He can see that Tuilagi is a major threat to Munster’s possession and initially does look to engage from the side, but rapidly realises that he’s in danger of conceding a penalty and completely releases the Leicester centre, putting his hands up in the air to show referee Romain Poite.
Earls arrives in as second man and carries out an excellent croc roll on the bulky Tuilagi, who is never really on his feet anyway.
It’s clever from Murray – who does still commit a penalty offence here – as he ‘manages’ the referee’s decision. Without Murray’s contribution, it’s likely that Tuilagi would have had the time required to get a good grip on the ball.
Just getting away with testing the limits of the law – a longstanding Munster strength.
Phase 4
A common feature in Munster’s attack this season is the tactic of an immediate pick and jam from a forward after their side has broken into opposition defensive territory.
Obviously, Murray is out of the game here after his rucking effort, but it’s highly likely that Donnacha Ryan would still have picked and carried here anyway.
Munster place a great value on attacking the defence again instantly after a break of any sort, immediately placing a new stress on the opposition as they look to recover and gain organisation around the breakdown.
Zebo clears out well after Ryan carries here, showing how Munster’s backs aren’t shirking their responsibility in this department.
Phase 5
Munster look to shift the ball wide again on fifth phase, as they play towards the right touchline.
Leicester have managed to get their width and linespeed back, however, and Jaco Taute is left to carry into a brick wall, which he does willingly.
Encouraging for Munster despite the net loss of yards is the simple pass from lock Billy Holland, demonstrating that this pack is not all about the physical stuff.
Niall Scannell and Holland arrive in to guard the ball and Murray moves play to the left.
Phase 6
Space appears to beckon wide on the left for Munster but Bleyendaal’s miss pass to Dave Kilcoyne is just slightly too high, meaning the loosehead has to juggle the ball.
That means Kilcoyne can’t turn and pop a pass out the back door to Zebo hovering in behind, so he carries instead, with John Ryan and Zebo clearing out Leicester’s Fitzgerald, while Keatley stands guard.
Phase 7
Murray switches back to the right again, bringing Munster through their zig-zag pattern and ensuring that Leicester have to remain switched on at all times on both sides of the ruck.
Again, there’s a tip-on pass from a Munster forward, Stander, while lock Holland also shows good footwork to step inside Lachlan McCaffrey and avoid being hammered well behind the gainline.
While Tom Youngs does manage to get a sniff of the ball, Stander and Bleyendaal combine to clear him away.
It’s slow ball and Munster are in danger of losing their momentum here, but Kilcoyne steps up on the next phase.
Phase 8
With the Tigers’ linespeed almost entirely absent, Munster’s loosehead prop accelerates into a direct line to the left of Murray.
It’s not the most glamorous job for Kilcoyne, but he gets Munster back over the gainline and onto the front foot.
His power is important, but he uses it ideally by picking out the slight disconnect between Mulipola and Fitzgerald, with the blindside flanker just a step or two behind the prop.
Kilcoyne identifies the chink of space and thunders into Fitzgerald’s inside shoulder for a positive carry, with Murray, Bleyendaal and John Ryan arriving to ensure Leicester don’t get any ideas about turning the ball over.
Phase 9
With Keatley stepping in as the halfback, Munster continue the same way this time and we get a glimpse of Zebo’s creativity.
The use of Zebo as a first receiver is something Erasmus will want to see more of over the course of the season, given the Ireland international’s ability to create try-scoring chances and produce linebreaks for himself and others.
It’s a simple dummy this time but Zebo threatens the Tigers defence, gets over the gainline and provides clean ball for Munster.
Phase 10
Keen to keep this new-found momentum going, Keatley gets to the ball and even with Murray arriving behind him picks and pops to Stander, who produces an excellent carry.
Again, this is a simple carry but Stander shows off all the important details for making gainline success.
First, he uses his footwork to manipulate the defender. It’s very, very subtle but Stander just stutters his feet to burst to Kitchener’s outside shoulder.
Next, he brings in one of the important carrying tools he possesses, planting the ball into his left hand and using his right hand to fend Kitchener, reducing the Leicester lock’s tackle effectiveness even more.
Thirdly, and perhaps most importantly, Stander changes the pace of his run at exactly the right moment, just as he gets to the outside of Kitchener. That change of pace is something Stander and many other Irish forwards excel at.
Finally, Stander finishes his job by fighting to get the ball back cleanly for Murray, lifting his upper body back up the pitch to ensure a clean presentation.
Phase 11
Coming off the touchline, it’s always difficult to make the major progress again, as the defensive team has the ideal opportunity to rush up and stop the ball.
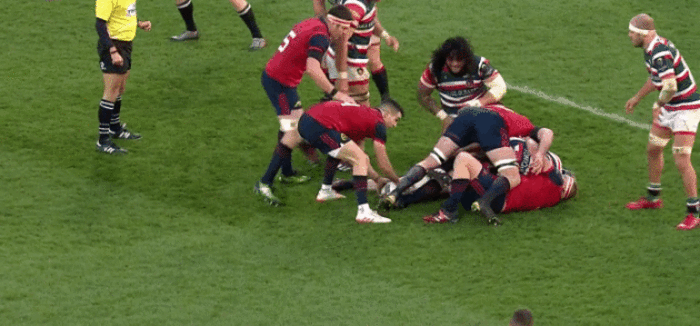
John Ryan does well with his carry – note the same details as Stander provided above – but with Fitzgerald chopping in low and grounding him, there’s a threat to Munster’s possession from Tigers openside O’Connor.
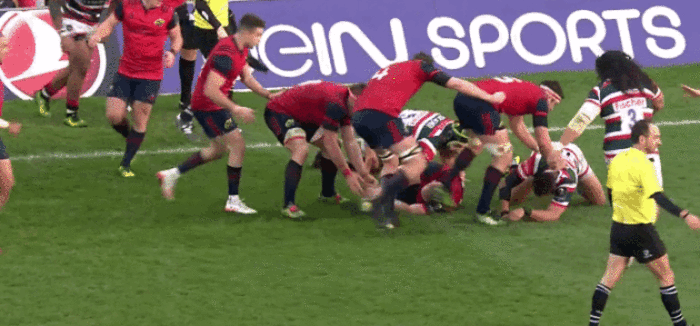
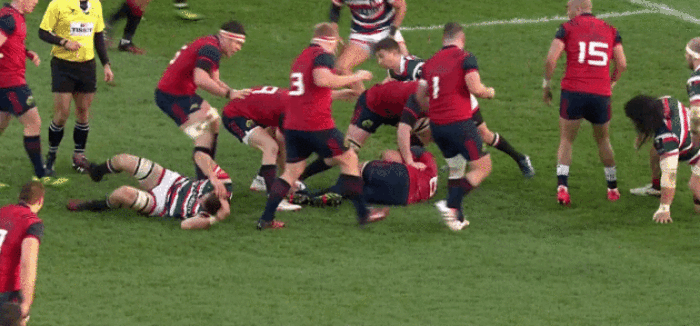
Now we see a fine example of the quality of Munster’s rucking – so obvious this season.
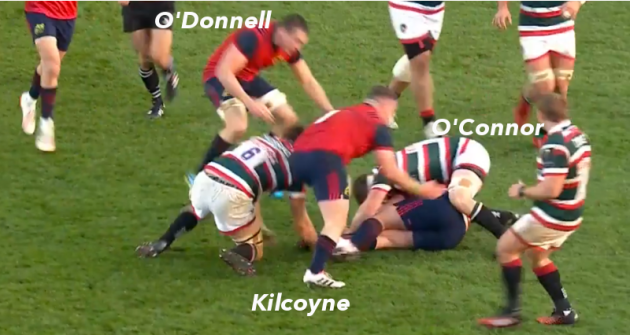
O’Connor leans forward over the ball, hoping that the arriving Munster players will bring him fully back to his feet as he clamps onto the ball, but the ferocity of Kilcoyne and O’Donnell in their clearout is superb.
Coming from slightly to O’Connor’s left side – the angle is important – Kilcoyne picks out two levers in O’Connor’s left leg and left arm, lifting him up away from the ball.
At the same time, O’Donnell – angling in from O’Connor’s right – drives his right shoulder down into the top of the Tigers openside’s back, while ensuring he also gets a wrap with his left arm.
It’s a little warning to O’Connor to stay away and the Leicester man duly releases.
Phase 12
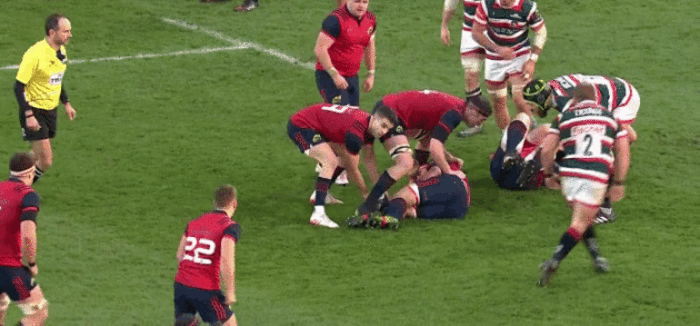
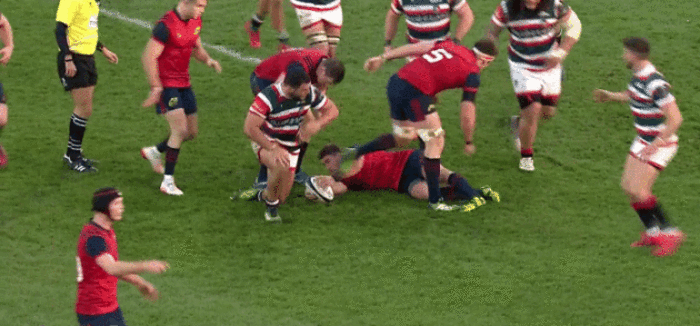
Zebo is hovering as first receiver again as Munster return to the short side from Murray’s pass. His creativity is even more apparent this time.
There’s obviously a numerical advantage for Munster here, but the narrow channel changes the situation.
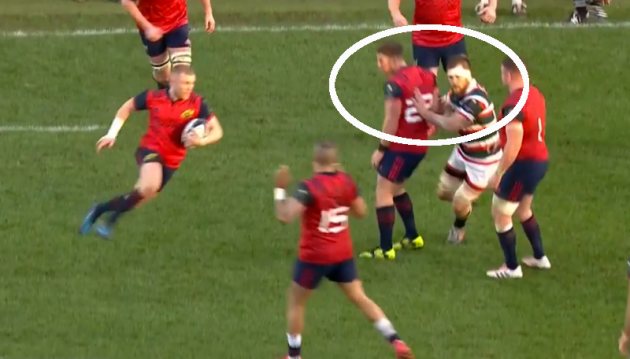
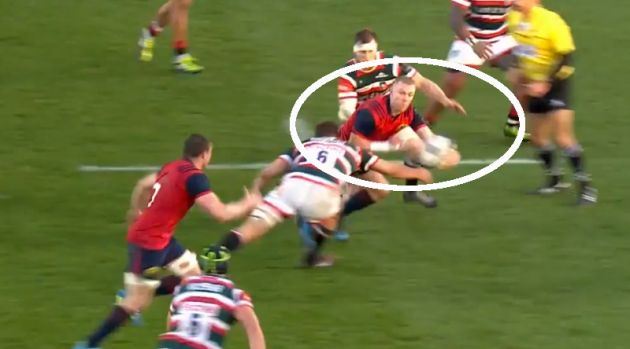
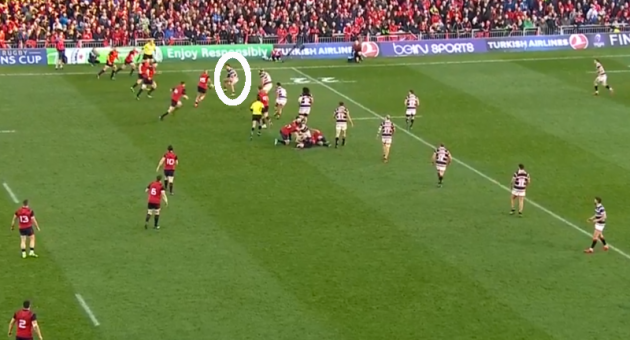
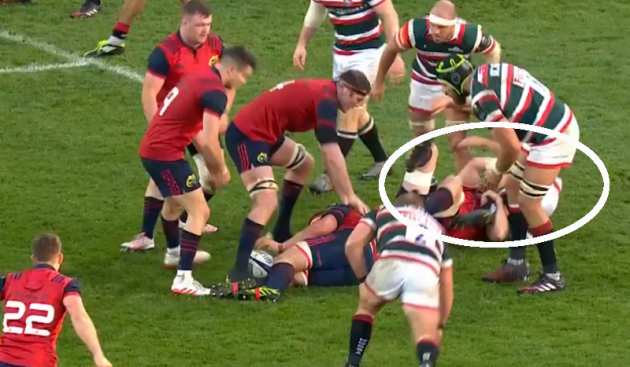
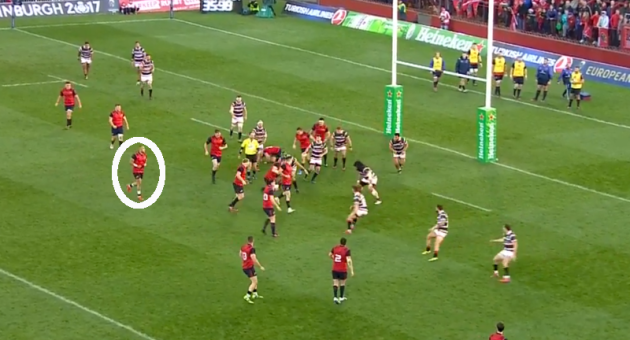
Leicester wing Peter Betham [circled below] comes up ahead of the defenders inside him, looking to cut out Zebo’s passing options.
For many players, this would be the cue to simply carry at the defence themselves, but Zebo’s mind produces another solution.
He pumps the dummy pass, continues to move forward in order to occupy Kitchener in the defensive line, then passes in behind Betham.
It’s so clever from Zebo to take advantage of a defender looking to pressure him, and shows the composure the Cork man possesses.
Earls gathers in the beautifully-slipped pass, bursts forward, shows his footwork again to leave Tuilagi sprawling and then carries into Kitchener and Betham.
Phase 13
In behind the defence? Munster return to their simple and intelligent pick-and-jam tactic.
Stander is the man in position this time and we see how well this attacking tactic works against the disorganised defence, as the Ireland back row makes further gains.
Donnacha Ryan thinks about another pick and carry as he arrives after Stander has been tackled by Fitzgerald, but appears to feel he may knock the ball on as he moves at pace. Instead, he makes a good decision to leave it for scrum-half Murray.
Phase 14
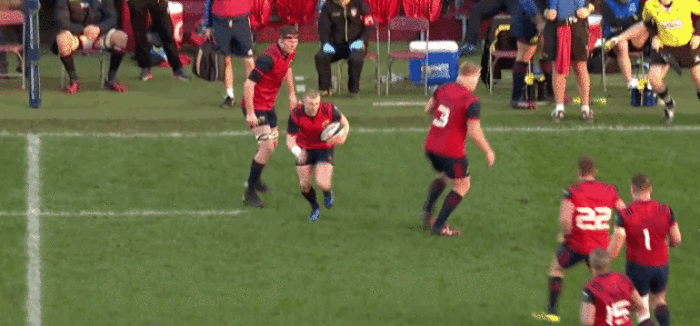
By now within 10 metres of Leicester’s tryline, Munster go direct again with a simple one-out carry from O’Donnell.
The good footwork of Munster’s forwards shines through in this example, as O’Donnell steps off his right foot and accelerates towards the contact.
There’s aggression and desire in his carry, as he wins the collision against McCaffrey.
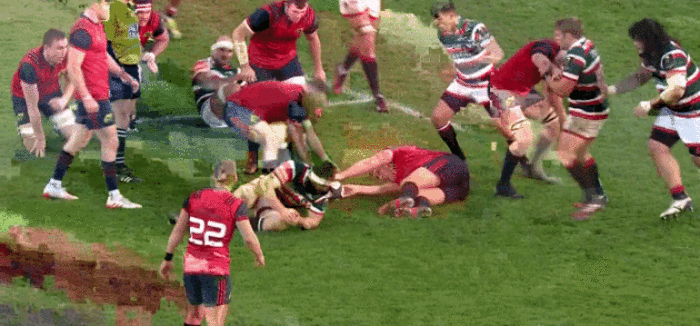
Again, the work of O’Donnell in fighting on the ground is important here. McCaffrey attempts to stay on his feet after the tackle and jackal over the ball. O’Donnell denies him a good shot at it by crawling slightly forward as he twists his upper body around.
It means Munster move forward another couple of inches, but also ensures that McCaffrey can’t get good access to the ball.
Once again, the clearout from Munster is superb. This time, it’s Holland and Peter O’Mahony who blast the Tigers player away and open up clean ball at the base of the ruck.
Phase 15
Eager to keep the momentum rolling, John Ryan picks and carries infield.
Donnacha Ryan is present over the ball in case of a Tigers threat, but steps forward in an attempt to interfere with Tom Youngs that actually allows Ben Youngs to burst through as Kilcoyne picks.
Phase 16
Scrum-half Youngs dives forward at Kilcoyne and manages to force the ball loose in his tackle.
Munster get a little lucky in that the ball bounces to Stander, but he reacts very well.
Tom Youngs gets a hand to Stander’s jersey as he carries, dragging the Munster number eight to ground, but Stander shows that fight once again to get back to his feet and trundle into Ben Youngs.
This time, O’Mahony makes sure Youngs is taken out of the picture.
The Munster captain drives forward into Youngs and drops to the scrum-half’s legs to bring him to deck.
It’s more of a tackle than a clearout as O’Mahony ensures that he takes an opposition player out of the game with him, however briefly. Donnacha Ryan stands guard as Murray arrives to pass right again.
Phase 17
It’s a one-out carry from a back this time, as Keatley steps up for Munster.
The replacement inside centre’s footwork is sharp as he dances to the outside of Genge, with Holland first to arrive and just get a shove on Tom Youngs ahead of the ball.
O’Donnell is in place for another of those pick and jams for Munster, but he spills the ball backwards as he attempts to scoop it up.
Phase 18
Reacting well, Murray gathers it in and slips a little inside pass to O’Mahony – a warning sign for Leicester.
The blindside flanker hammers forward again, into the tackle of Kitchener and Mulipola, and Ben Youngs arrives in over the ball threatening a turnover.
John Ryan acts swiftly, whoever, making a good decision to use the croc roll on Youngs, rapidly removing him, with Donnacha Ryan arriving second to help finish that clearout.
Phase 19
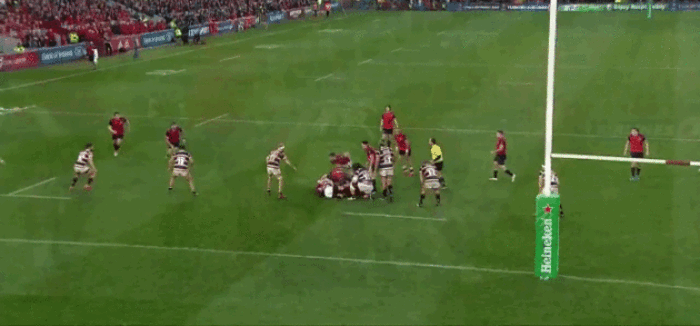
Finally, almost two minutes after the passage of attack started, Munster are ready to make their scoring strike.
This play is something Munster have done consistently over the last two or three seasons, and the success of it underlines the theme of the province finally playing how Anthony Foley wanted them to play.
This arcing run by the scrum-half, followed by a pop back inside, is something Foley drove his team to do, sometimes without successful execution.
Here, the decision-making around when to use the play is perfect.
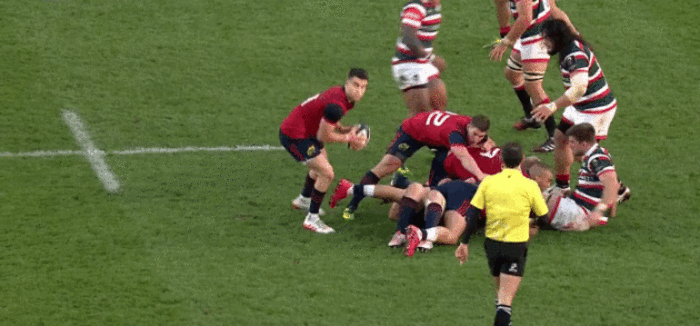
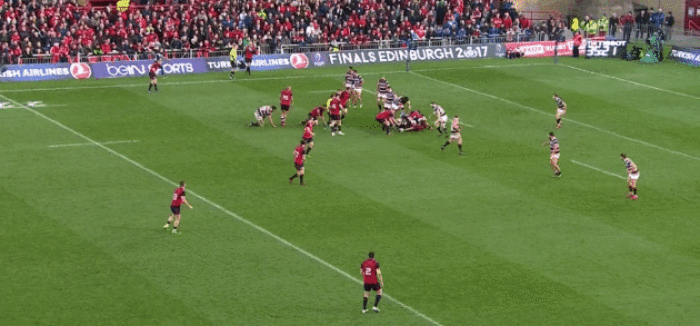
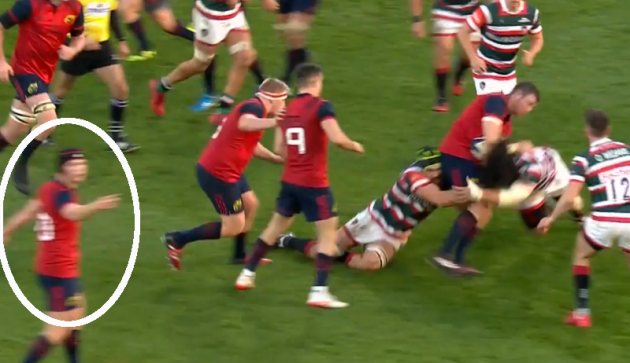
As O’Mahony goes to carry just before the scoring phase, we can see Zebo already hovering in behind [circled below], clearly thinking about where he can most effectively pop up.
His positioning is obviously key to the score, as he emerges from a hidden position in behind the ruck.
The running line of Jaco Taute outside Murray is also important to the try being scored, as he fixes defenders on the outside.
Going back to O’Mahony’s carry again, we can see playmaker Bleyendaal communicating to Taute to run that line, as indicated below.
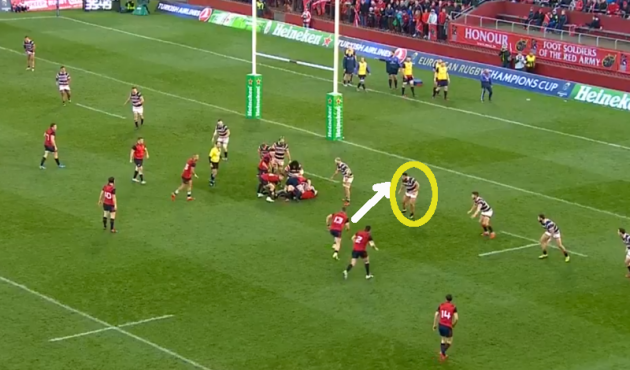
Taute responds perfectly, coming on a hard ‘unders’ line, that is, angling back towards the ball on Murray’s outside [indicated by the white arrow below].
Taute manages to attract the focus of Genge, circled in yellow above, when the Tigers loosehead’s job here should be to worry about Murray.
The whole organisation of the defence is a mess from Leicester’s point of view in this instance.
It’s worth just noting how out of shape they are.
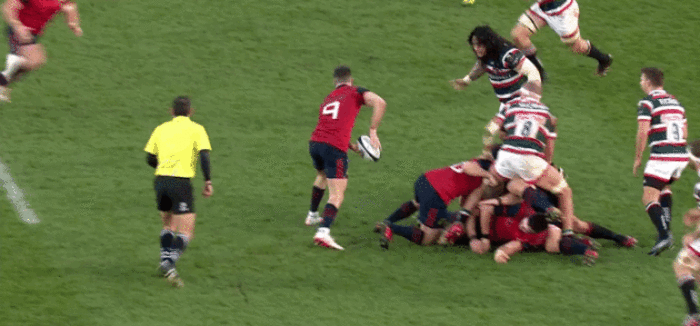
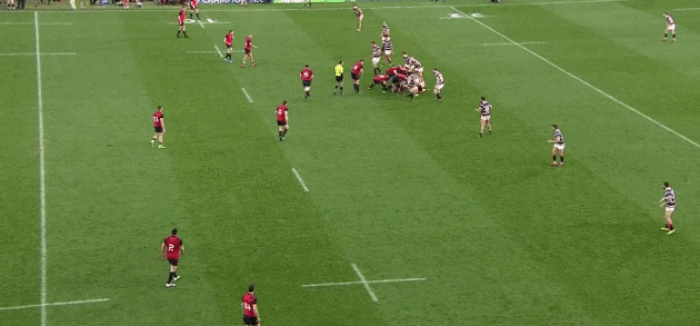
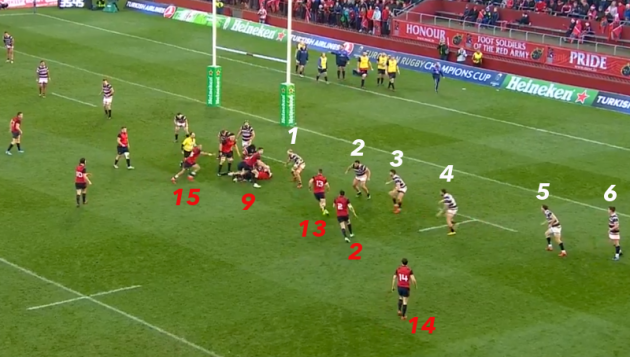
McCaffrey, marked 1 above, is the Leicester pillar and his primary job here should be to hold at the very edge of the ruck and cover any late inside passes from Murray, the red 9, as he snipes.
Genge, 2, has started too wide of the ruck and, as we know, he is interested in Taute when his job should be to deal with the threat of Murray sniping from the base of the ruck.
Owen Williams, 3, is the man who should be marking up on Taute, red 13, while Adam Thompstone, 4, should be aligned on Niall Scannell, the red 2.
That would leave George Worth, 5, and Freddie Burns, 6, to deal with the wide threat of Darren Sweetnam, red 14.
Instead, Leicester’s spacing is very poor and they get too wide of the ruck. They have more than enough numbers on this side of the ruck to deal with Munster’s threat, but they fail to do so.
That is, in large part, down to the relentless work rate of this Munster attack, with the ball having been in play for two minutes and with the Tigers having been forced to shift around the pitch and retreat after Munster breaks.
We can see that Leicester’s outside backs realise that their spacing is poor at a late stage, with Thompstone calling for them to compress inwards, but Munster have already identified the opportunity and called their play.
It’s unclear whether the call comes from Zebo – most likely – or Bleyendaal in behind after directing Taute, but Munster’s execution is perfect.
Murray snipes to McCaffrey’s outside shoulder and releases a deft, no-look pass inside to Zebo, whose timing is perfect.
The Munster fullback’s power takes him through the Leicester number eight’s despairing attempt to turn back in and tackle, with Zebo finishing in front of the delighted Munster replacements.
The42 is on Instagram! Tap the button below on your phone to follow us!
