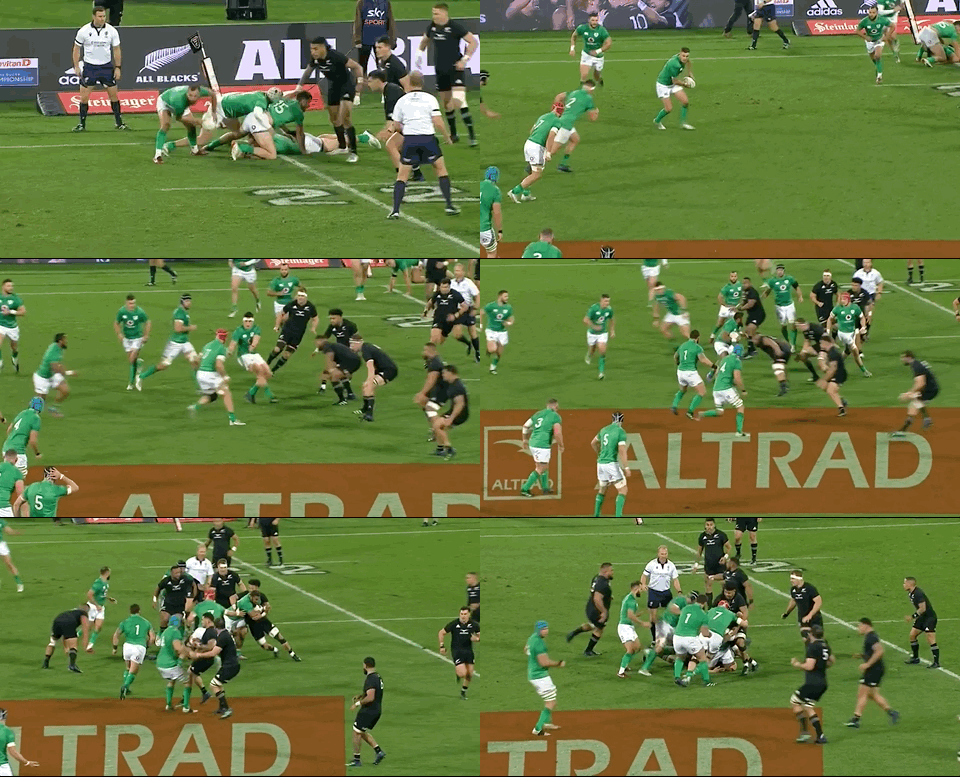
THE ALL BLACKS had months leading into this series to analyse the Irish attack and build a plan to limit its effectiveness.
They knew exactly how dangerous Ireland can be, having been shredded by them many times in their November defeat in Dublin.
But Ian Foster’s side have ultimately failed to live with the Irish attack again in their Test series back on home soil.
Today’s third Test victory saw Ireland strike intelligently and clinically as they took full advantage of the strong lineout and maul platform delivered by Paul O’Connell’s forward pack.
Attack coach Mike Catt, who is responsible for Ireland’s plays off set-piece, will have been delighted with how they repeatedly stretched and stressed the Kiwi defence, bringing it to breaking point on several occasions.
There was also more evidence of how hard it is to defend against this Ireland team’s array of ball-carriers and ball-handlers in the pack, with head coach Andy Farrell getting further reward for pushing his side to develop a more varied armoury.
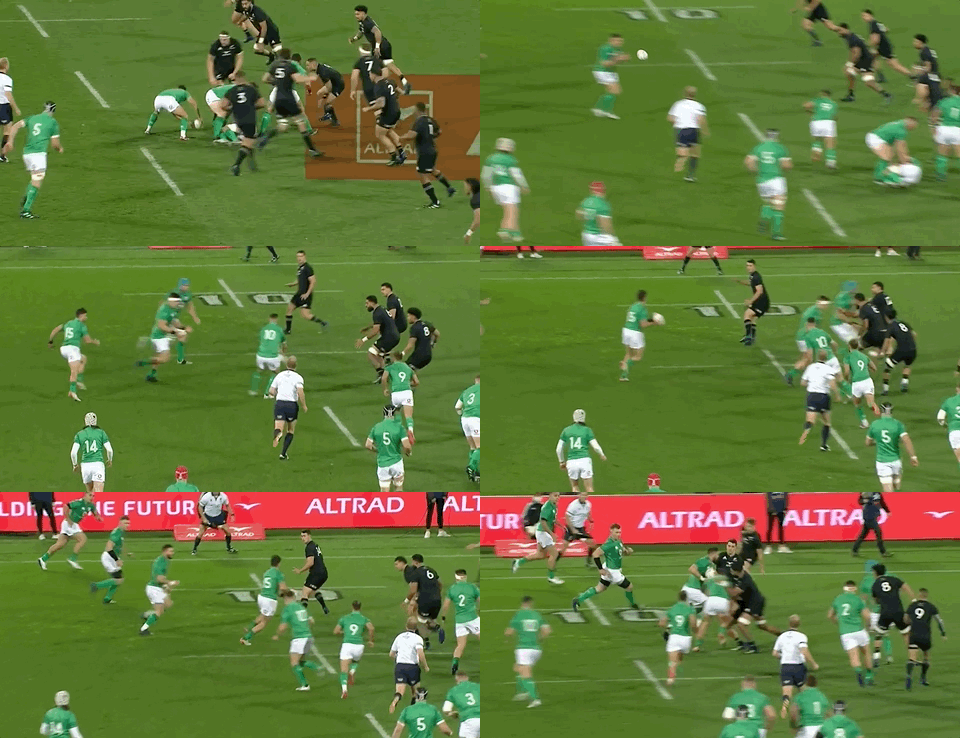
Ireland broke the Kiwis with their very first possession of the game, sparking a brilliant start for the third Test in a row.
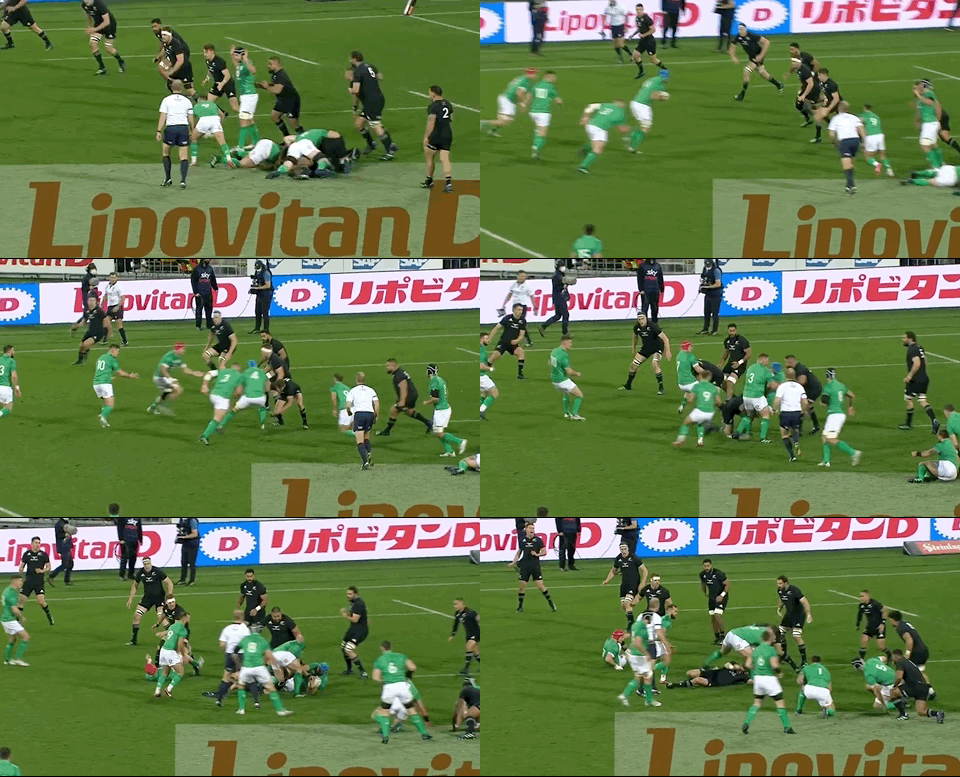
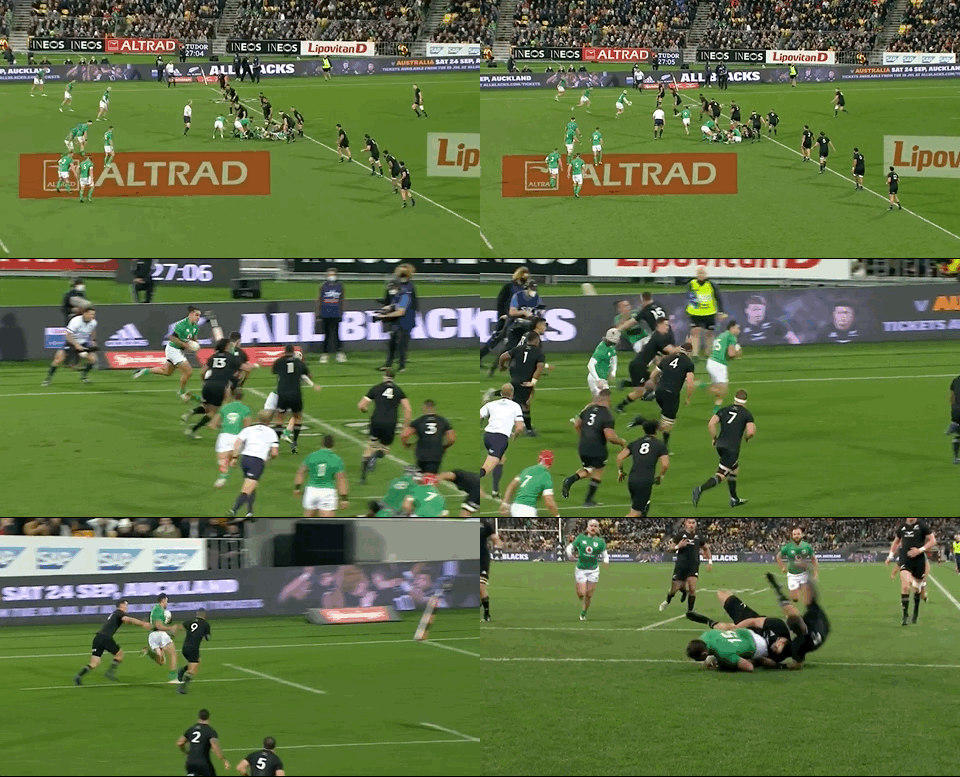
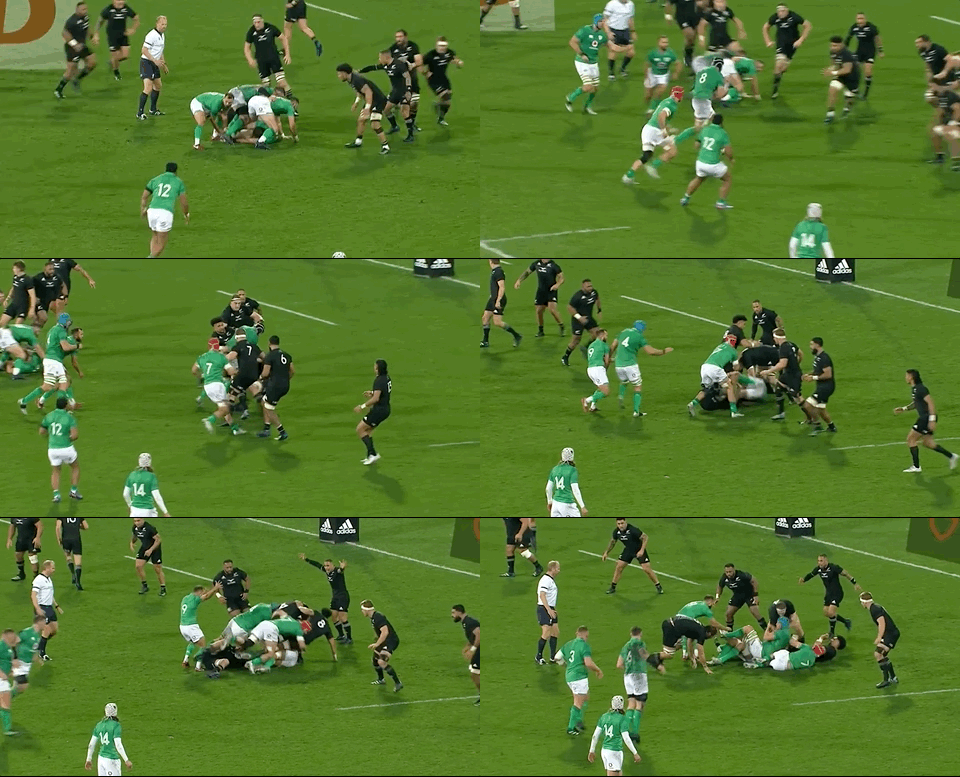
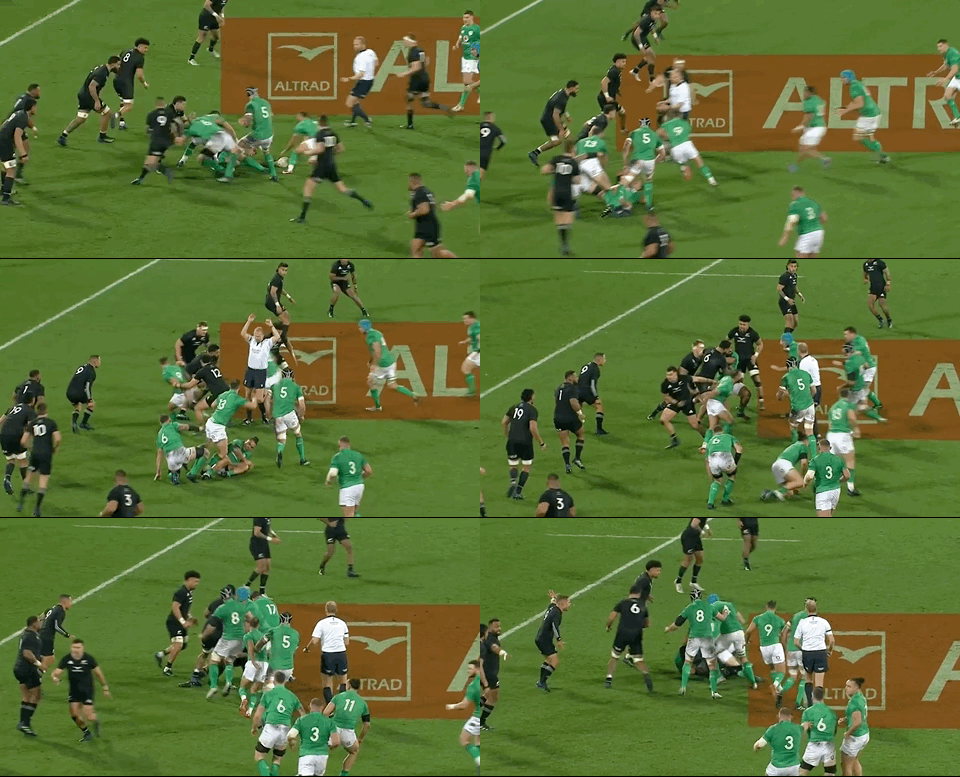
Hugo Keenan counters off the Kiwis’ exit kick, James Ryan and Bundee Aki make carries to Ireland’s right, then they bounce back to Caelan Doris on the left where he breaks a tackle.
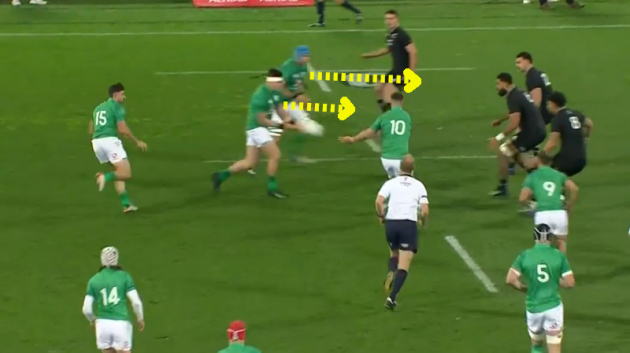
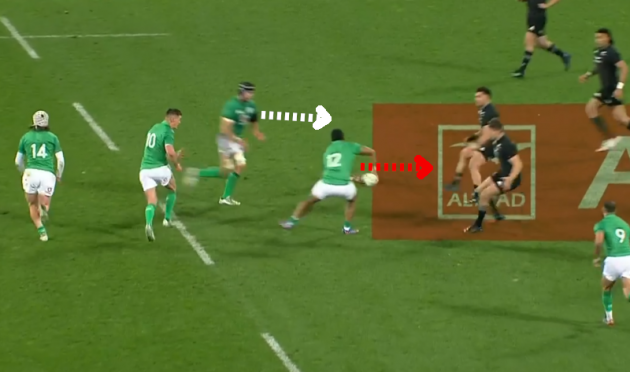
The shape around Doris is important to him making the bust here.
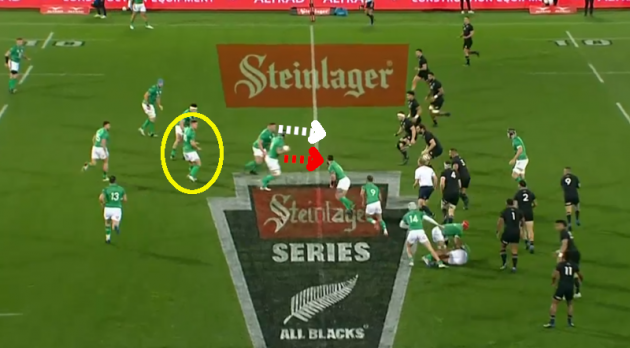
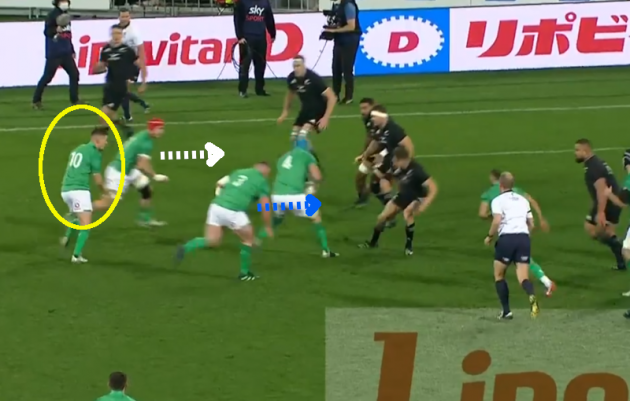
As we can see below, Doris [red] is a ball-carrying threat himself, but he also has Tadhg Furlong [white] running a short line on his left for a possible tip-on pass, while Johnny Sexton [yellow] is in behind for a potential link pass out the back.
Doris runs straight upfield and carries the ball in two hands to ensure that he’s more difficult to read. If he runs with the ball in one hand, it’s obvious to the defenders that he will carry into contact himself.
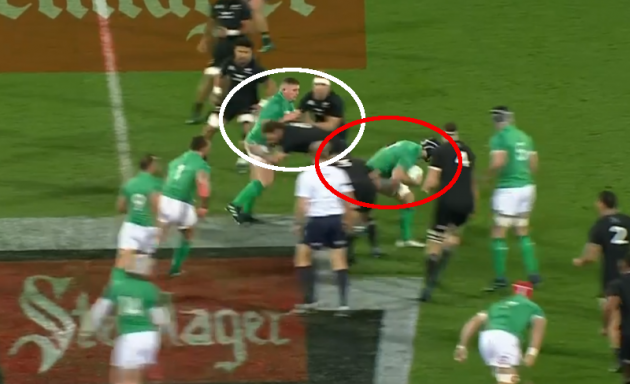
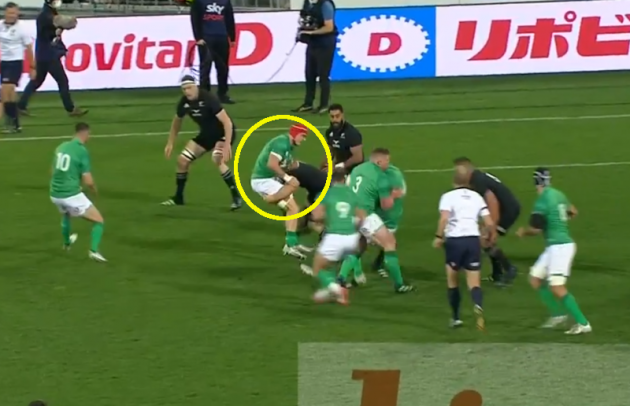
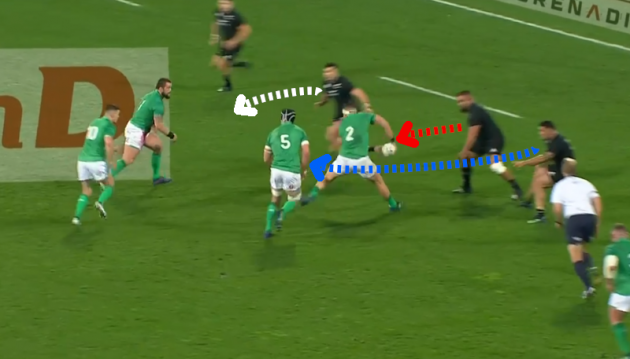
Doris has eyes on Sam Whitelock in the New Zealand defence as he dummies a pass and the Kiwi lock buys it, lining up Furlong with his tackle as Sam Cane does the same on his outside shoulder [white below].
That leaves Doris in a one-on-one contest against New Zealand tighthead prop Nepo Laulala [red above], who is relatively immobile and already chasing from the inside.
Now they’re in behind the Kiwis, whose defensive line has naturally been shortened for the next phase. Ireland nearly create a score.
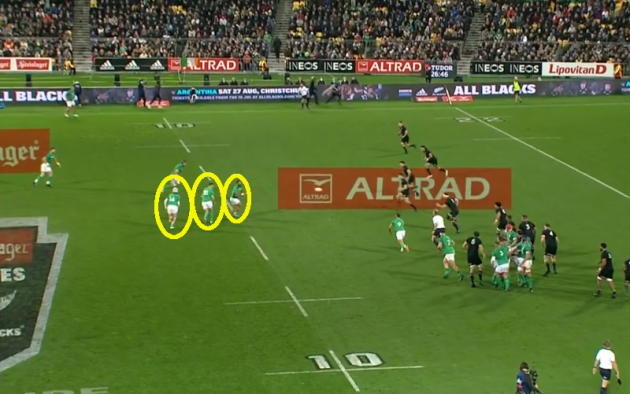
It’s a lightning-quick recycle for Ireland from the breakdown as New Zealand scramble and Sexton opts to play out the back of the two-man pod of forwards made up by Dan Sheehan and Tadhg Beirne [yellow below].
That two-man pod aim to hold the New Zealand defence on the inside, forcing the edge defenders to make tough decisions.
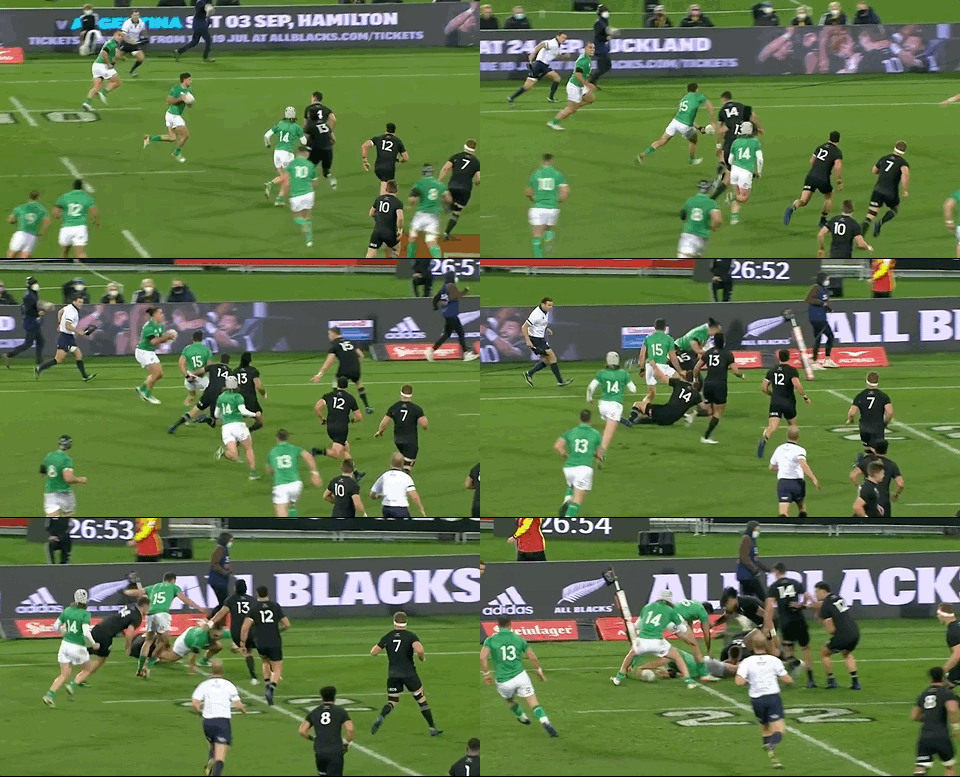
Keenan does a superb job on the ball for Ireland here. He exploits the numbers-up situation wonderfully.
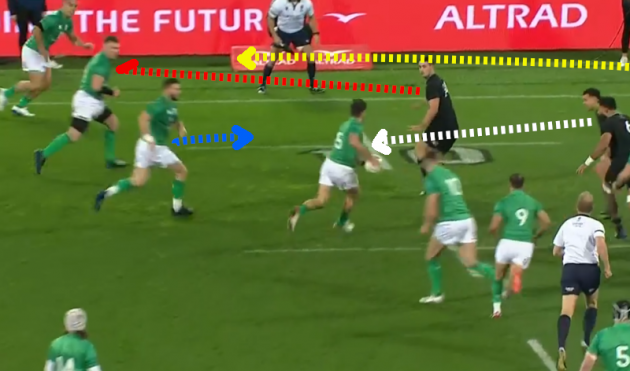
All Blacks centre David Havili is initially held by the run of Beirne but reads off him to worry about Keenan, who subtly straightens his run to target Havili’s inside shoulder [white below].
Meanwhile, Will Jordan is hoping that Havili can drift off Keenan and get to Robbie Henshaw.
As a result, Jordan makes a decision to shift onto Peter O’Mahony [red above], knowing that Beauden Barrett will close up from the backfield onto James Lowe [yellow].
So that all leaves Henshaw [blue above] with space to run into. Keenan does an excellent job of delaying and delaying his pass until Havili has sat down on him and Jordan has read off Henshaw onto O’Mahony.
The timing of the pass is excellent and Henshaw can fire up a left-handed fend at Jordan as the All Blacks wing turns in onto him, then get the offload away to O’Mahony.
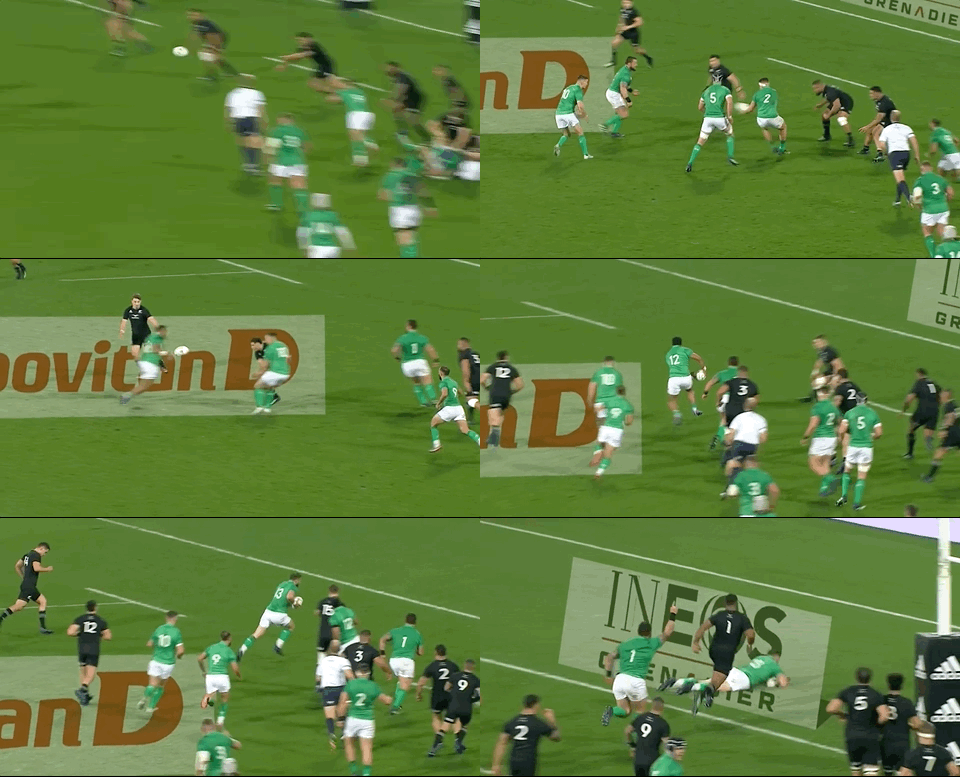
O’Mahony draws up Jordie Barrett, the second Kiwi backfield defender, and throws what might have been a scoring pass to Lowe but for Beauden Barrett’s brilliant trackback recovery to intercept the ball.
We can see above that Ardie Savea is accelerating back towards the corner flag and he might have pulled off a try-saving tackle on Lowe, but it’s a big play from Barrett to deny Lowe the possible try-scoring chance.
So New Zealand survive Ireland’s first attack but Havili’s clearing kick to touch doesn’t make it beyond the 22-metre line and Farrell’s side go again from the lineout.
Aki, Doris, and Andrew Porter all carry before the All Blacks give up a soft penalty that is caused by Ireland’s attacking shape.
Ireland’s set-up here is very familiar, with Tadhg Beirne at the heart of a three-man pod.
Josh van der Flier offers the tip-on option [white below], Tadhg Furlong is inside for a possible tip-in pass [blue], and Sexton is connected out the back [yellow].
As with Doris before, Beirne dummies and carries himself.
All Blacks captain Cane buys the dummy and tackles van der Flier off the ball.
The penalty is about 10 metres in from the left-hand touchline and some might have expected Sexton to have a shot at goal with this early opportunity.
It’s not quite a gimme three points though and Ireland’s usual approach to this kind of situation under Farrell and during Sexton’s captaincy has been to go into the corner.
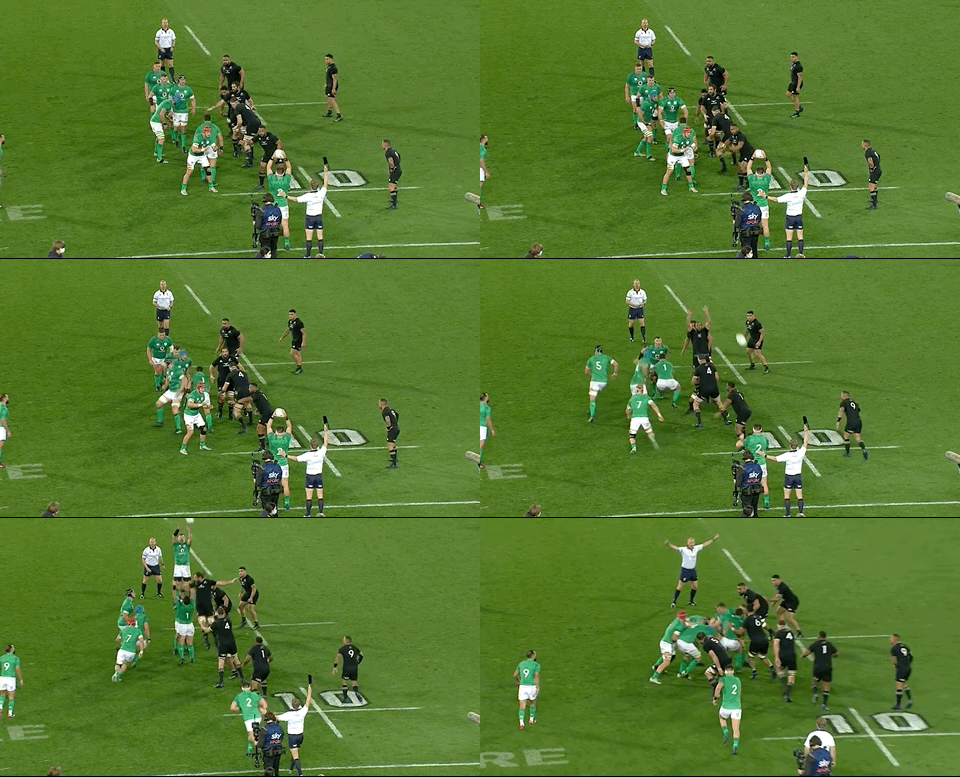
Here, the Ireland skipper has a brief word with Ryan and Beirne.
They seemingly sense their early momentum and have an intent to attack the Kiwis.
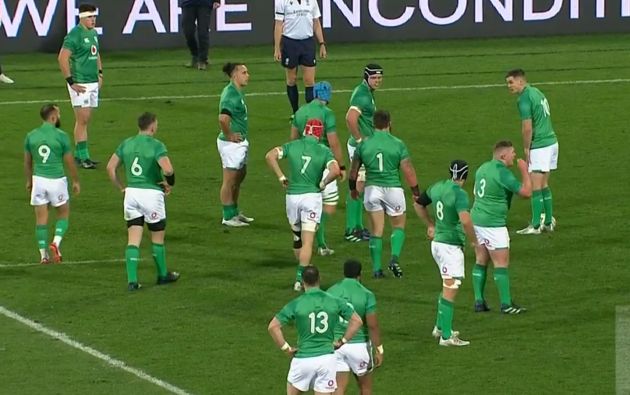
As Sexton kicks into the corner, lineout leader Ryan brings his forwards into a huddle and calls the play.
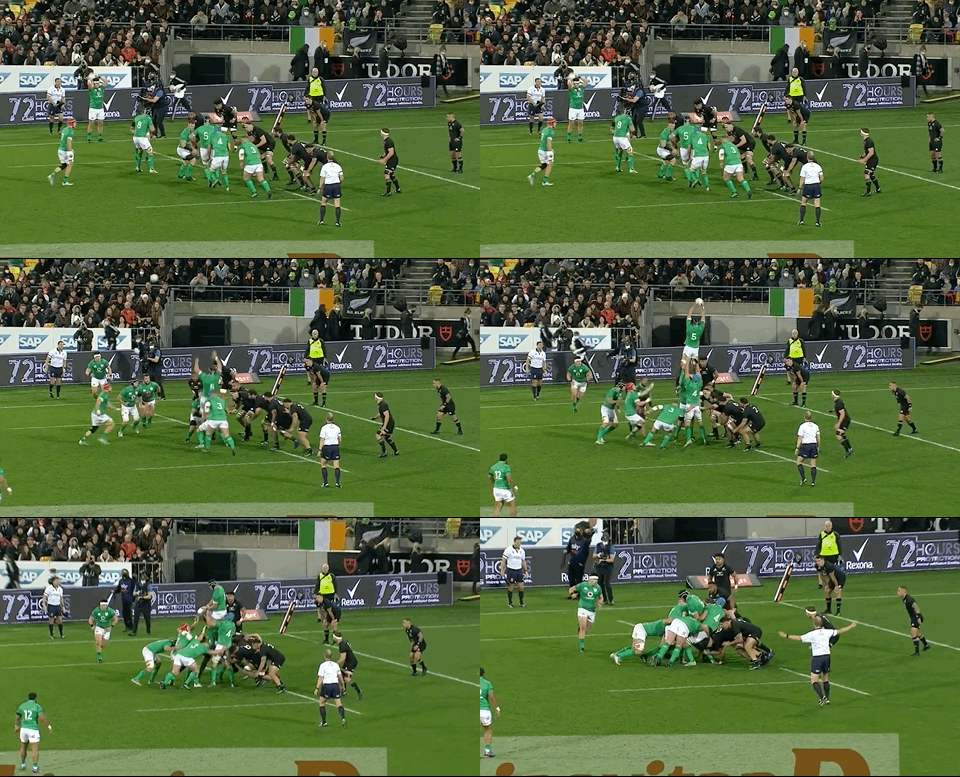
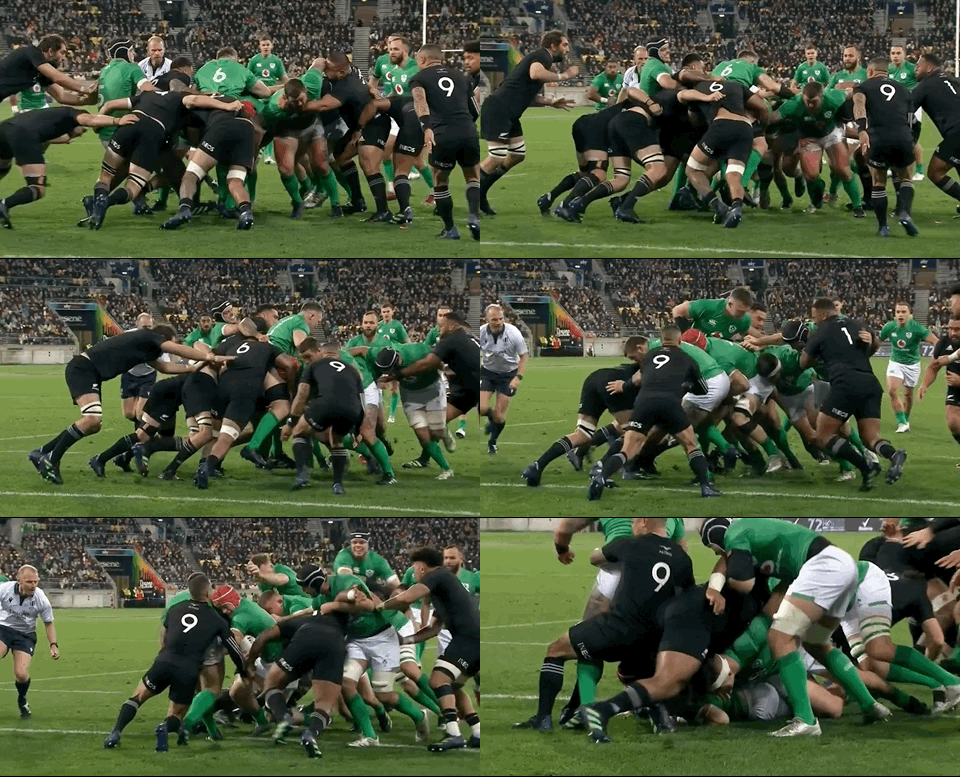
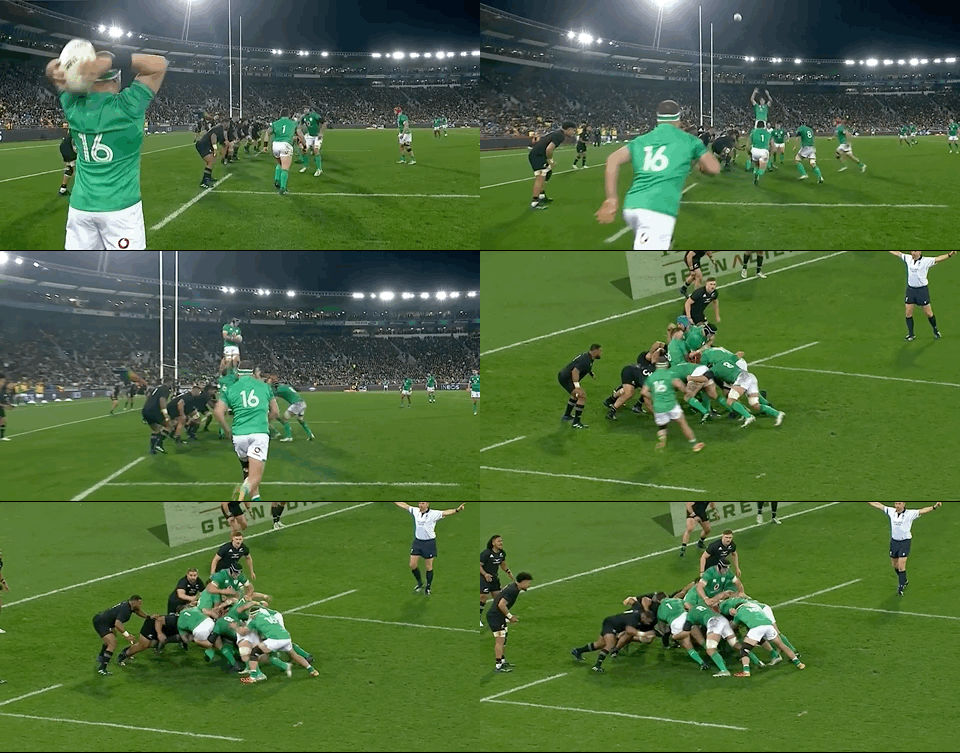
Ireland walk into their 6+1 lineout and jump immediately through Ryan, with New Zealand opting to stay on the ground with the aim of denying Ireland maul momentum.
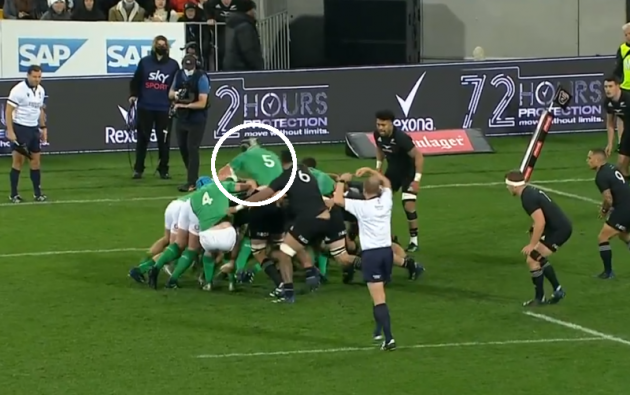
Ireland’s intent with their maul is to shift the drive to their left and they rotate around Ryan after he transfers the ball to van der Flier, who arrives in from the ‘+1′ position a couple of metres behind the lineout.
Every single part of the maul functions well here for Ireland.
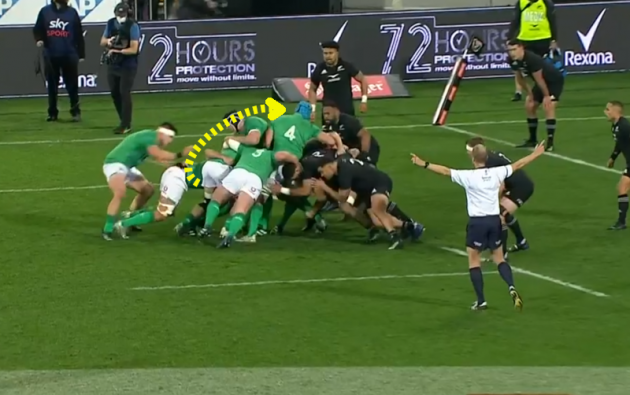
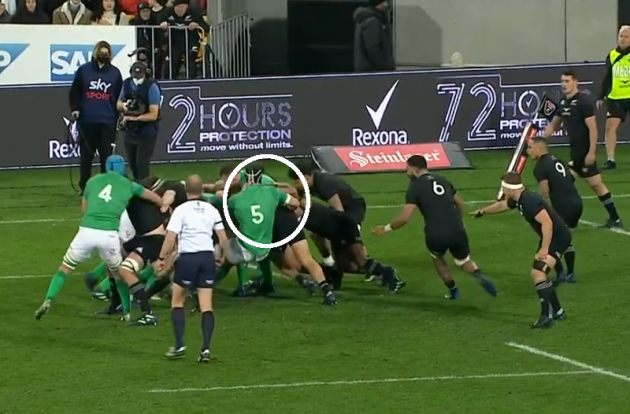
Beirne initially ‘braces’ to the right of Ryan after lifting him, absorbing the Kiwis’ counter-drive impact on that side before he looks to drag Whitelock and Brodie Retallick [yellow below] away from the maul as Ireland shift to their left.
Ryan, meanwhile, is the director of the operation, roaring out instructions as Ireland make their move.
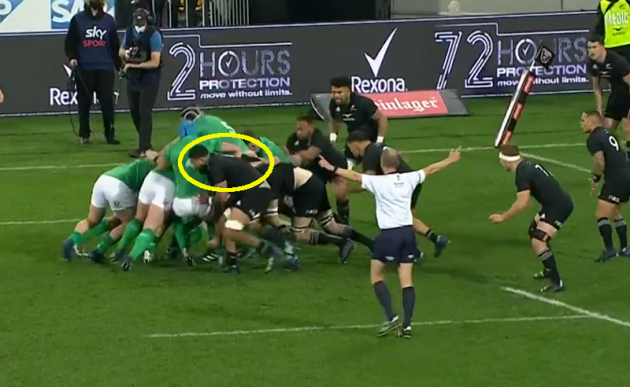
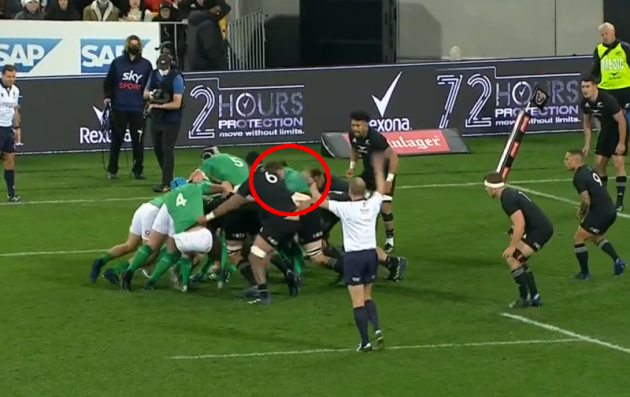
Once Ireland have initiated their shift left, watch below how Ryan has changed his focus to Kiwi hooker Codie Taylor, wrapping him up to unbalance him as he looks to counter.
Having lifted at the front of Ryan and then braced strongly on that side, it’s O’Mahony [red below] who essentially becomes the front of the Irish maul, leading them on that shift drive to the left.
And in behind O’Mahony, the Irish maul has formed to create lots of forward momentum.
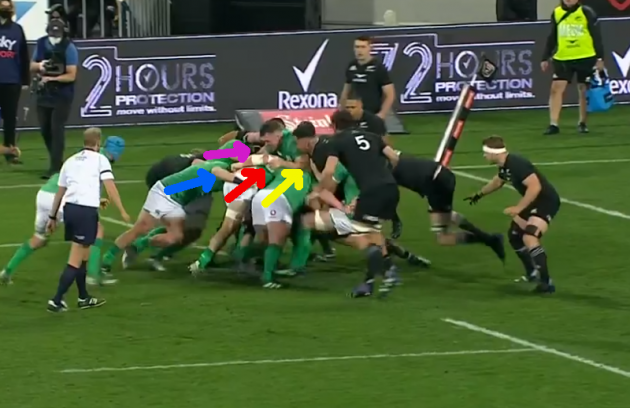
Van der Flier [red below] is the ball carrier, Furlong [yellow] has slotted into his right, Doris [pink] to his left, while Sheehan [blue] arrives in from the touchline too.
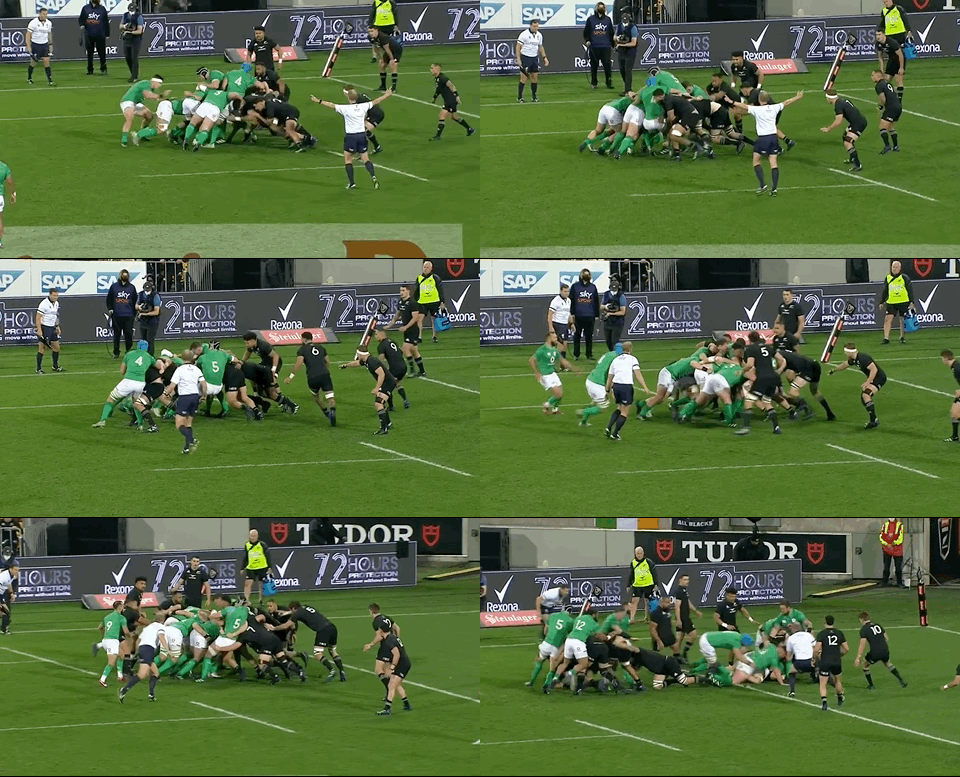
The one man hidden from view here is Porter, who leads a second mini-shift to Ireland’s left as O’Mahony is slowed up by the Kiwi defenders.
Indeed, it’s Porter who is right at the front at Ireland’s surge takes van der Flier over the Kiwi tryline in emphatic fashion.
This clinical maul score means Ireland are 5-0 up with less than five minutes played and their attack continues to cause the Kiwis problems for the remainder of the first half.
There is plenty of defending and kicking for Ireland to do in between, but their second score through Keenan is another excellent try.
It starts with another instance of strong lineout and maul work from Ryan and co.
Dummy jumps by Ryan and then Beirne in Ireland’s six-man lineout lure Whitelock into the air and allow O’Mahony to get a clean win of Sheehan’s sharp throw to the tail.
Because New Zealand have competed in the air, they’re poorly set to deal with the ensuing Irish maul, which powers forward and earns a penalty advantage for blatant side entry.
It’s the dream scenario from set-piece, giving Ireland more freedom to push the play as they use the advantage to full effect.
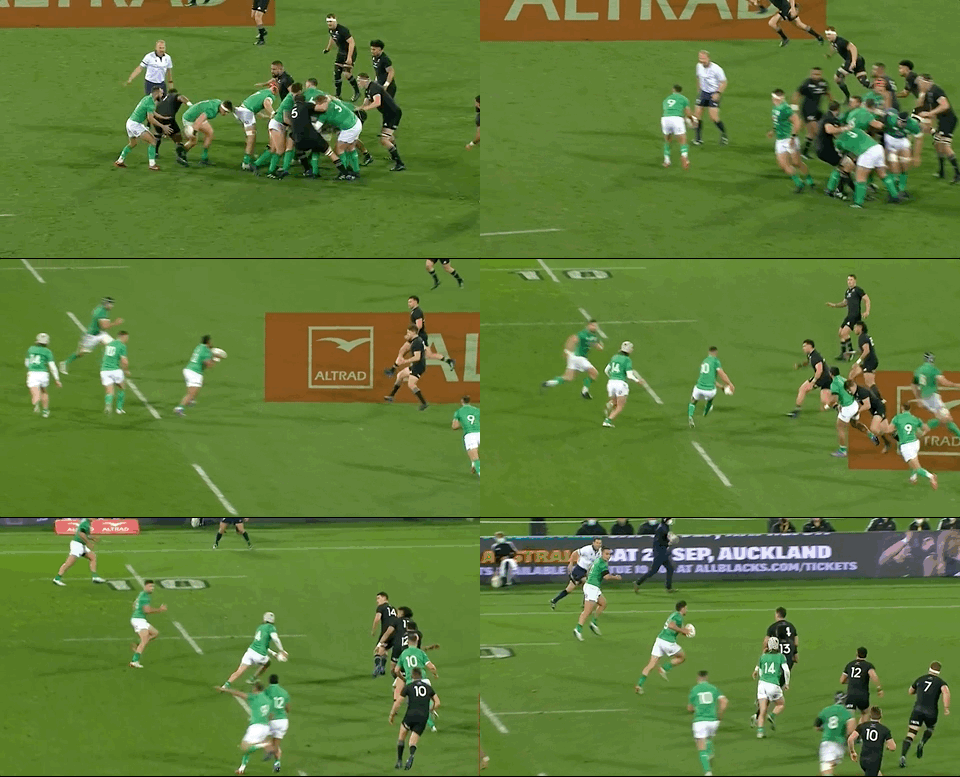
And so, they play off it as Sheehan offers the ball back to Jamison Gibson-Park one-handed, sparking an expansive attack all the way towards the left touchline.
Aki is at first receiver and he is at the tip of a three-man stack for Ireland, with Sexton and right wing Mack Hansen lurking in behind ready to swing up into play outside Aki.
We know that Aki is a ball-carrying threat himself, while Doris [white below] is running a hard line on his outside shoulder, with their intention being to sit down those inside Kiwi defenders.
As Aki instead uses his passing game to find Sexton out the back, we see that Henshaw is the direct runner on the next wave of this play.
New Zealand do adjust here, reading off the Irish front-door options but Ireland still preserve a fair amount of space on the left edge.
James Lowe also does a good job of eking every possible gain out of the play, taking on Jordie Barrett on the outside despite not having a huge amount of room to do so.
Lowe regularly backs his power and balance in these situations and he takes Ireland up to the Kiwi 22 in this instance, while also ensuring they have had to work really hard across the pitch after the set-piece.
Ireland use their three-man pod off Sexton coming from the touchline, with Sheehan swivelling to link out the back to Aki.
Clearly Ireland have lost a couple of metres here but they have succeeded in their intention of splitting the New Zealand defence, which now has to cover the openside as well as a substantial 20-metre shortside.
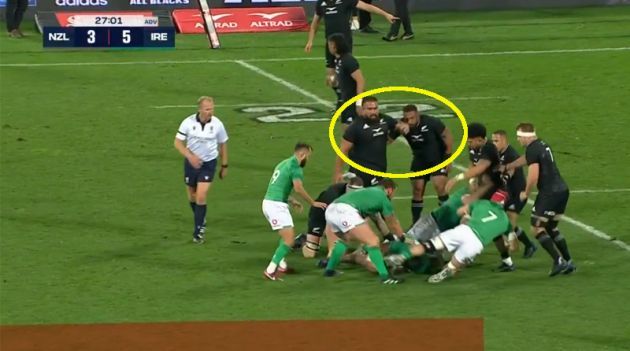
The Kiwis are disorganised in that shortside, with props Laulala and George Bower [yellow below] very tight to the breakdown and already looking very fatigued.
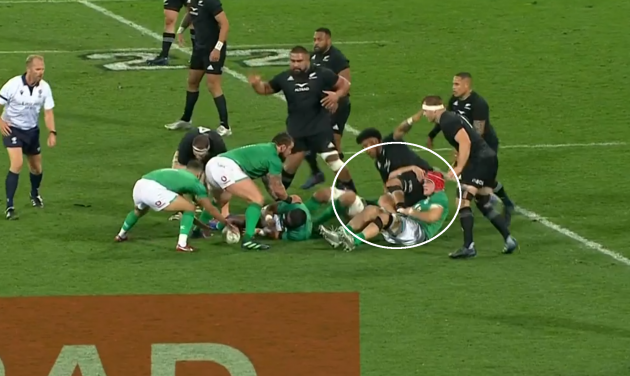
Van der Flier and Doris clear out Savea and ensure he goes to ground [white below], meaning he can’t move into the shortside to defend.
There is a risk of giving up a penalty here for clearing out beyond the ruck, but referee Wayne Barnes is content with this Irish effort.
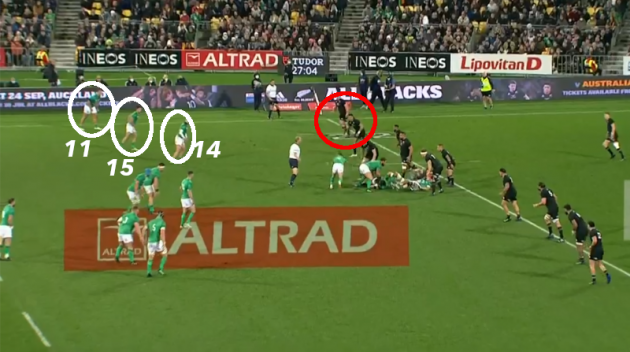
This all means that Rieko Ioane and Jordan [red below] are the only really viable defenders in the shortside frontline defence for the Kiwis.
Ireland, meanwhile, are very organised with the back three of Hansen, Keenan, and Lowe having held in that channel ready to attack as Ireland zig-zag back to their left.
Hansen does an excellent job as first receiver for Ireland here. This has been a big area of growth in their game.
Sexton is obviously still the key influence and playmaker in attack, but others in the squad have taken on more responsibility and, therefore, allowed Ireland’s attack to be less predictable and more two-sided.
Watch how Hansen runs at Ioane to sit him down, then throws the skip pass as Jordan bites in on Keenan.
Lowe accelerates down the left touchline, draws in fullback Jordie Barrett, and throws a no-look pass back inside for Keenan to finish.
It’s a superb three-phase strike from Ireland that stems back to their excellent lineout and maul.
Sexton’s conversion sends Ireland 12-3 in front after half an hour, but still there is time for Ireland’s attack to do more damage before the break.
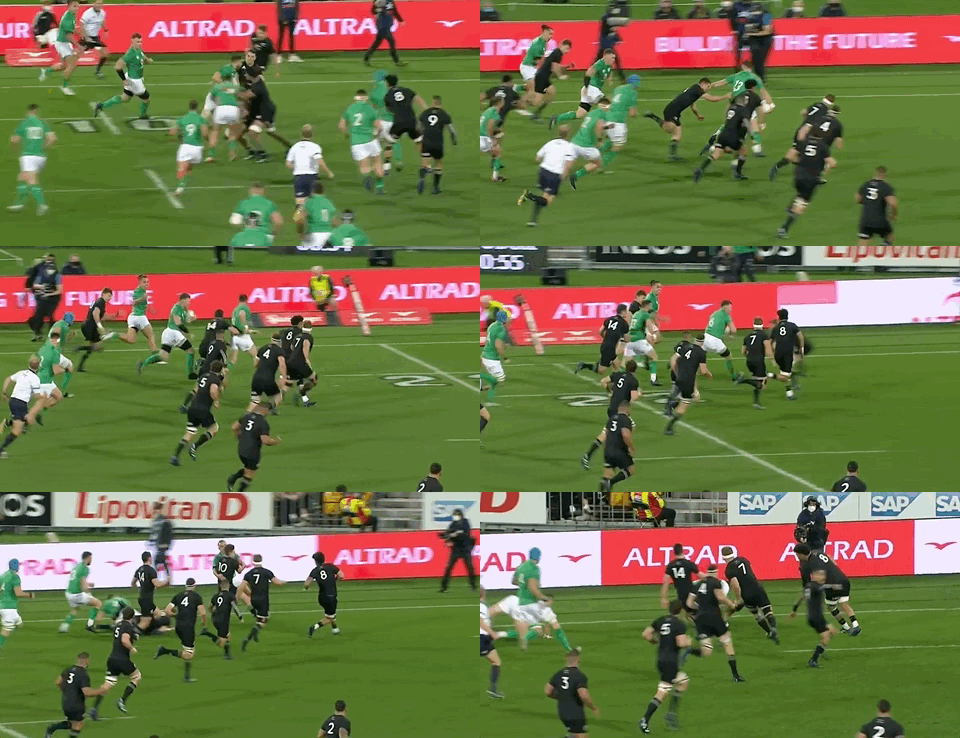
After a needless offload attempt from Laulala to Bower goes forwards under the Kiwi posts, Ireland cut them apart from the ensuing midfield scrum.
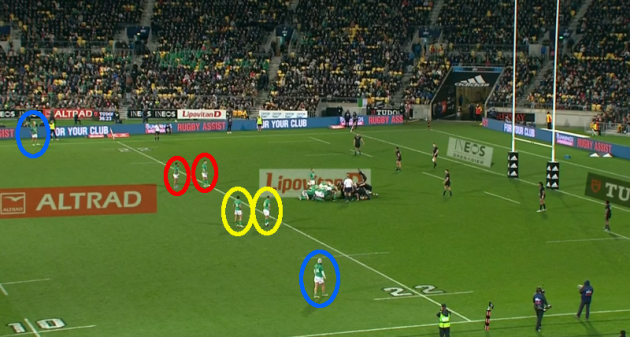
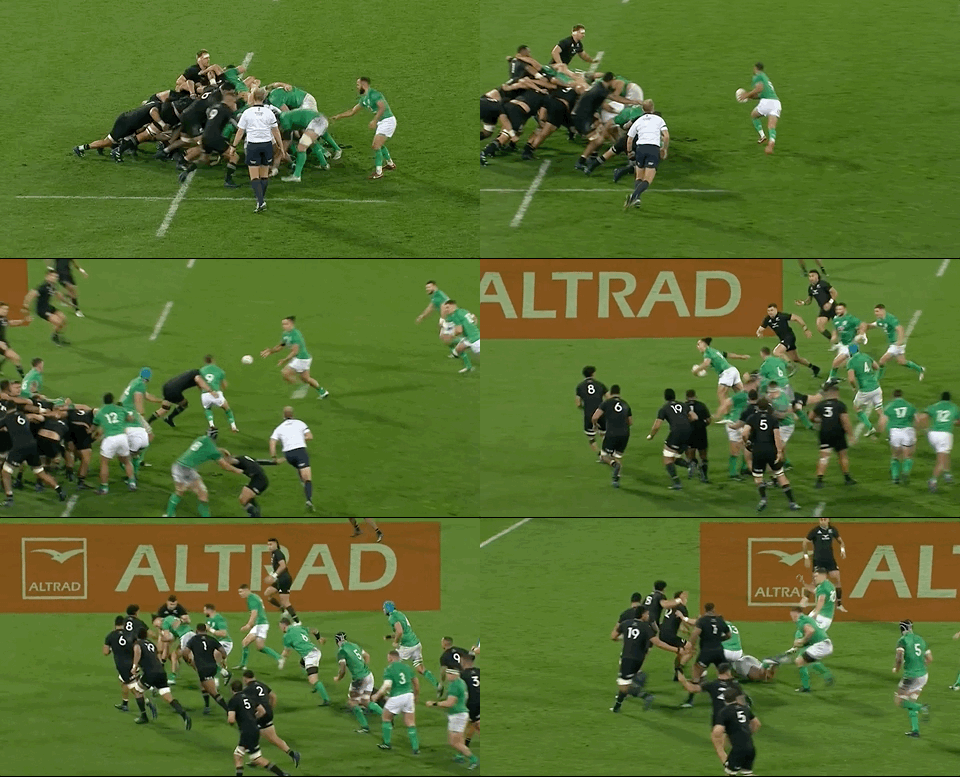
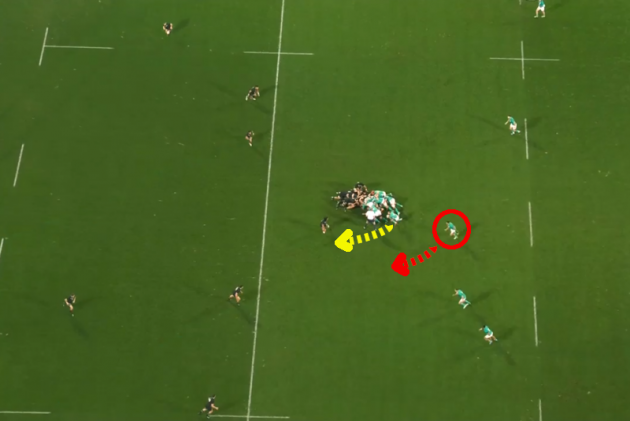
As we can see above, Ireland have two-man stacks on either side of the scrum, with Sexton and Aki [red] on the left, while Henshaw and Keenan [yellow] start on the right.
Lowe and Hansen [blue] ensure there is good width in the Irish attack, stretching the Kiwi defence straight away.
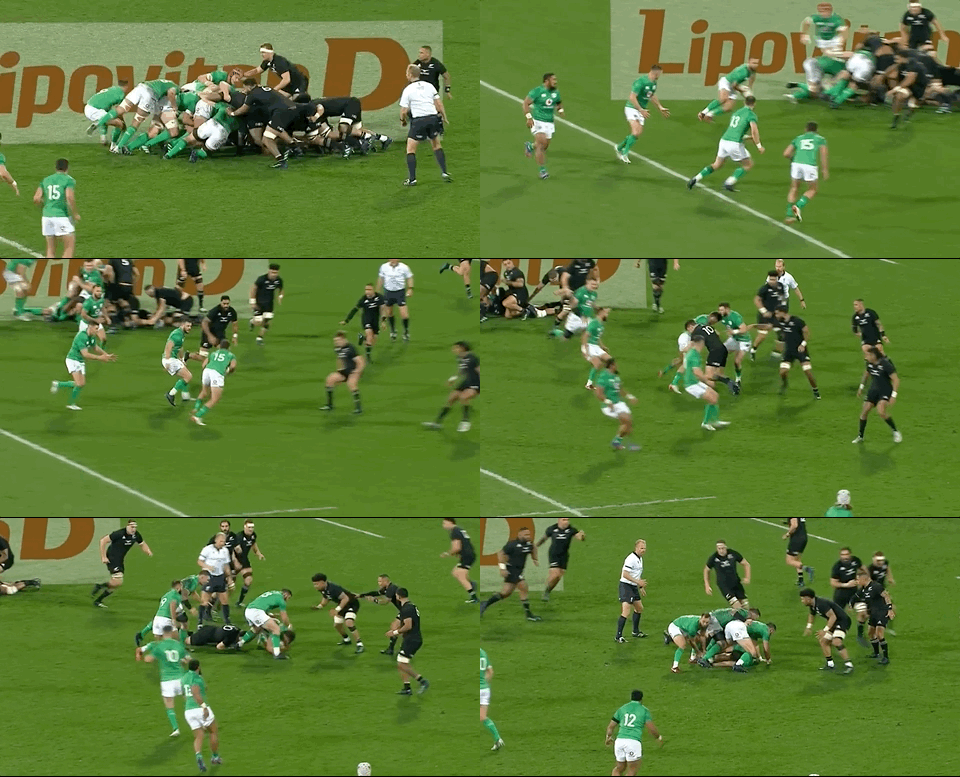
The Irish scrum comes under pressure but Gibson-Park wheels away and they target Kiwi out-half Beauden Barrett with a Keenan carry on first phase.
With Henshaw and O’Mahony designated with manning that breakdown, there is no window for the Kiwis to compete and Ireland have lightning-quick ball.
Already, we can see the Kiwis chasing hard around the corner as they come from the scrum.
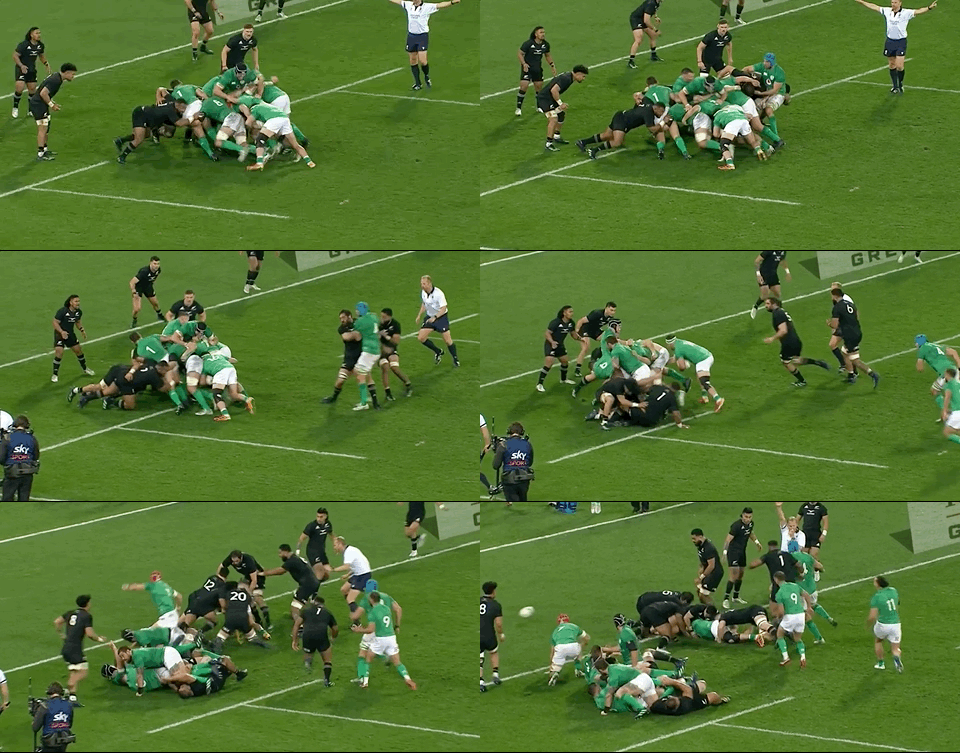
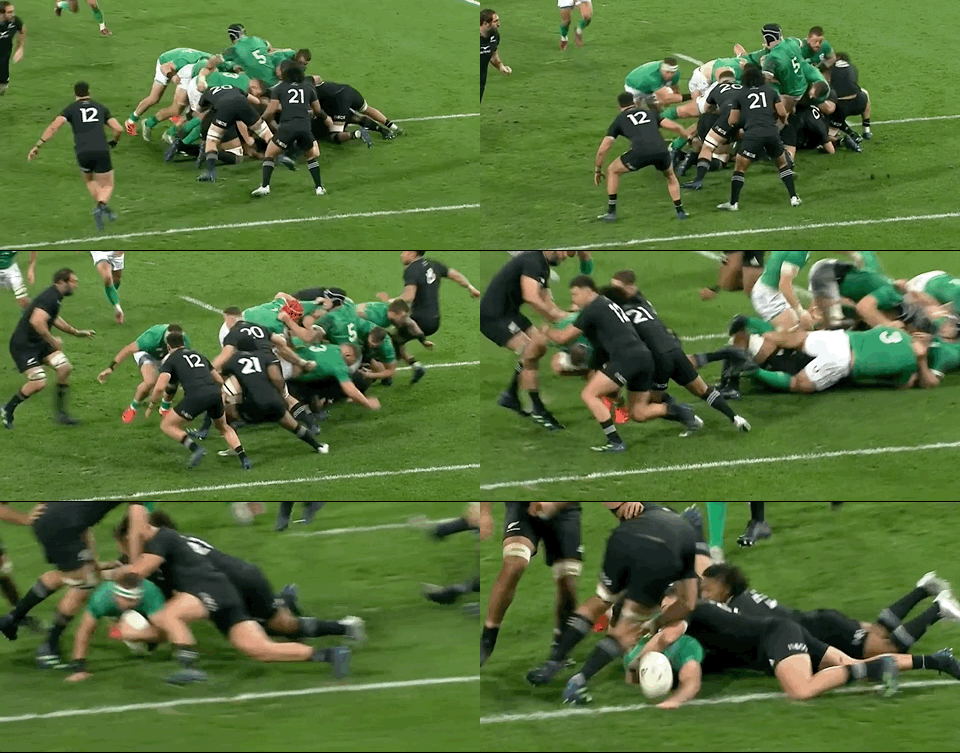
And Ireland’s second phase does take them around the corner as Doris thunders onto Gibson-Park’s pass, powering into the space between Cane and Whitelock to batter over the gainline.
Retallick has a jackal attempt but he is cleared away with real efficiency by Tadhg Beirne, who blasts the Kiwi lock off the ball, while van der Flier removes Savea from the equation.
As Beirne is clearing out, O’Mahony and Furlong work around the corner to Ireland’s right as if to carry there again…
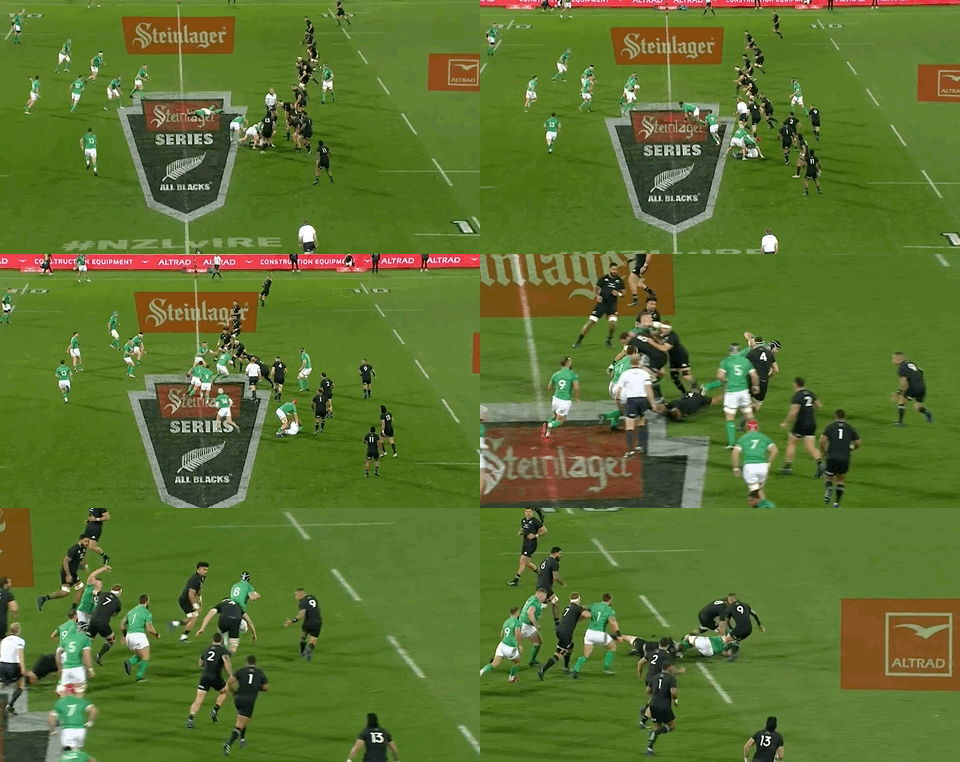
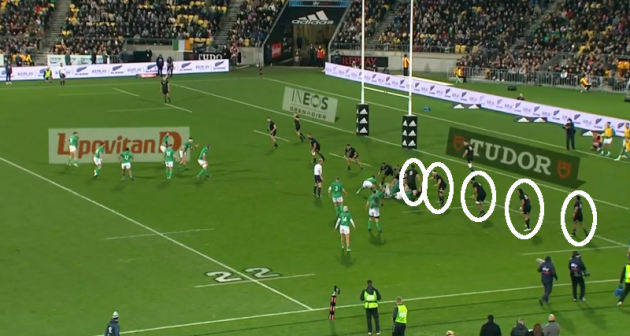
Ireland have already achieved their aim of having the Kiwis overload this right-hand side of the ruck, as we can see below.
Ireland’s three attackers are up against five defenders on that side of the ruck, so it’s obvious that the Kiwis aren’t going to be in ideal shape on the other side.
At the point above, Ireland’s attack on their left-hand side is obviously very bunched but they swing into action with wonderful fluency.
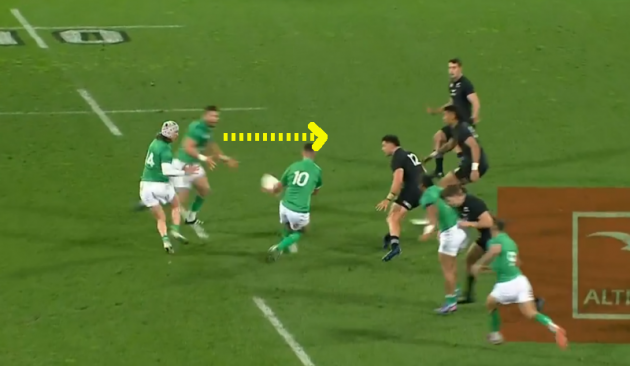
Ireland play out the back of their three-man pod here again, with Sheehan the man to throw the link pass to Sexton.
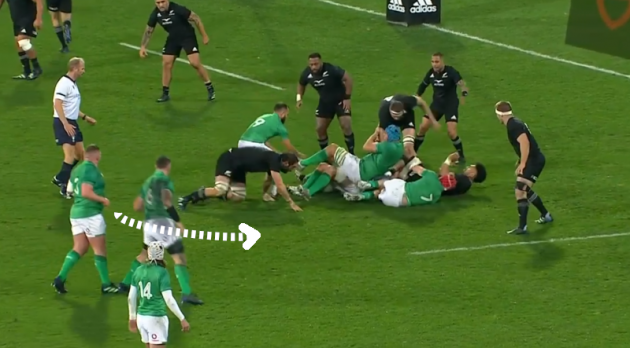
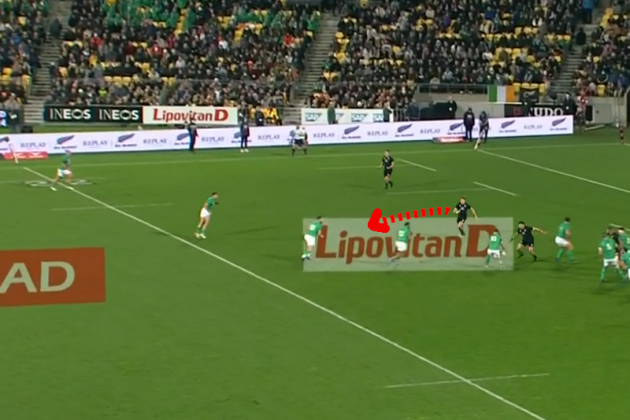
Sheehan does an excellent job of staying ‘square’ – running straight up the pitch – and fixing Laulala [red below].
Ryan’s run on the inside of Sheehan sits down Taylor [blue above] and that all means that David Havili [white] has to make a decision as to whether to sit down on Porter running the tip-on option or go at Sexton out the back.
Havili makes a good decision in picking out Sexton as Sheehan plays the link pass, but the Ireland out-half then has Aki straightening up on his outside shoulder to burst into a gap.
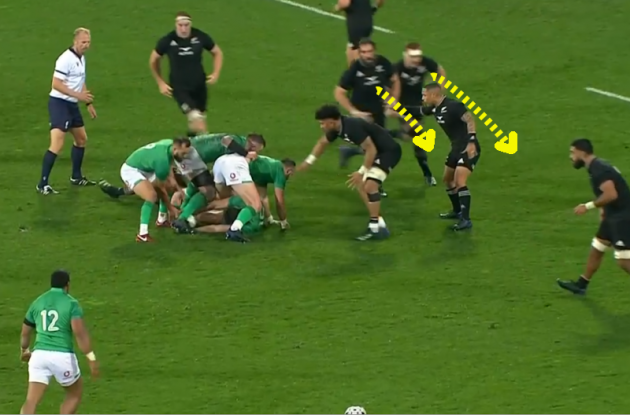
We can see above that Beauden Barrett has shot up looking for an intercept on the outside of Aki.
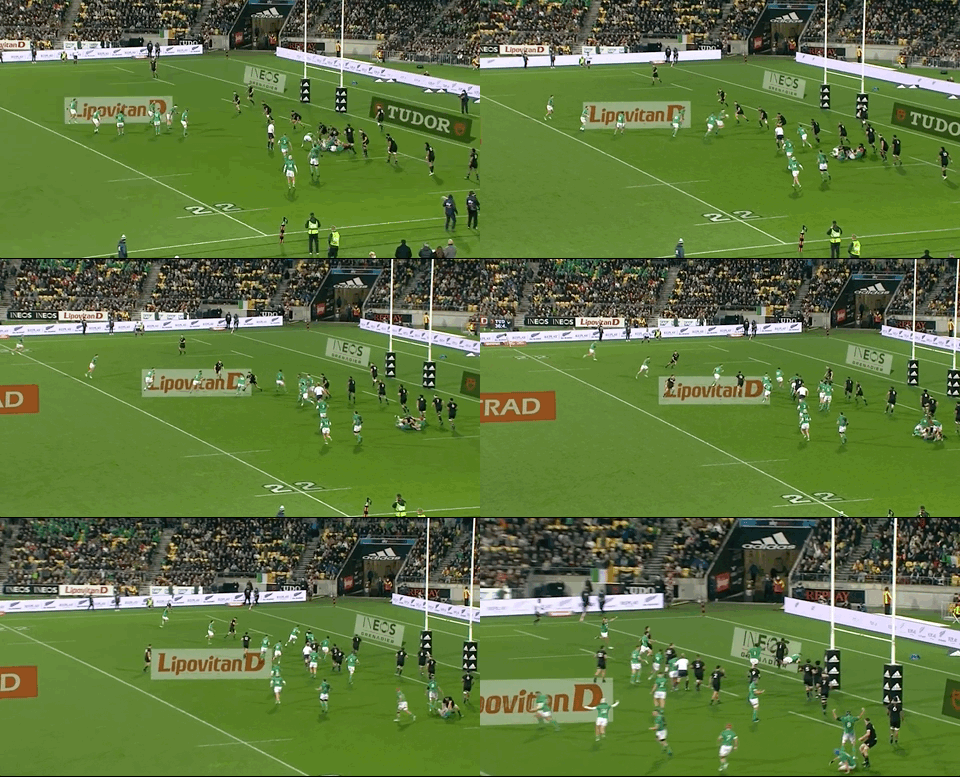
The wider angle below underlines to us that the Kiwis are defending a 5-on-3 given Ireland’s overload in attack.
Barrett takes a punt on Sexton skipping Aki to Henshaw.
Had Sexton done so, Barrett very likely would have intercepted the ball and sprinted away for a Kiwi try. But Sexton, as ever, makes the right decision and sends Aki through the hole to feed Henshaw for another wonderful try on third phase.
Ireland had plenty of defending to do in the second half as the Kiwis battled back into the game, but Farrell’s side still managed to do damage with their attack off set-piece.
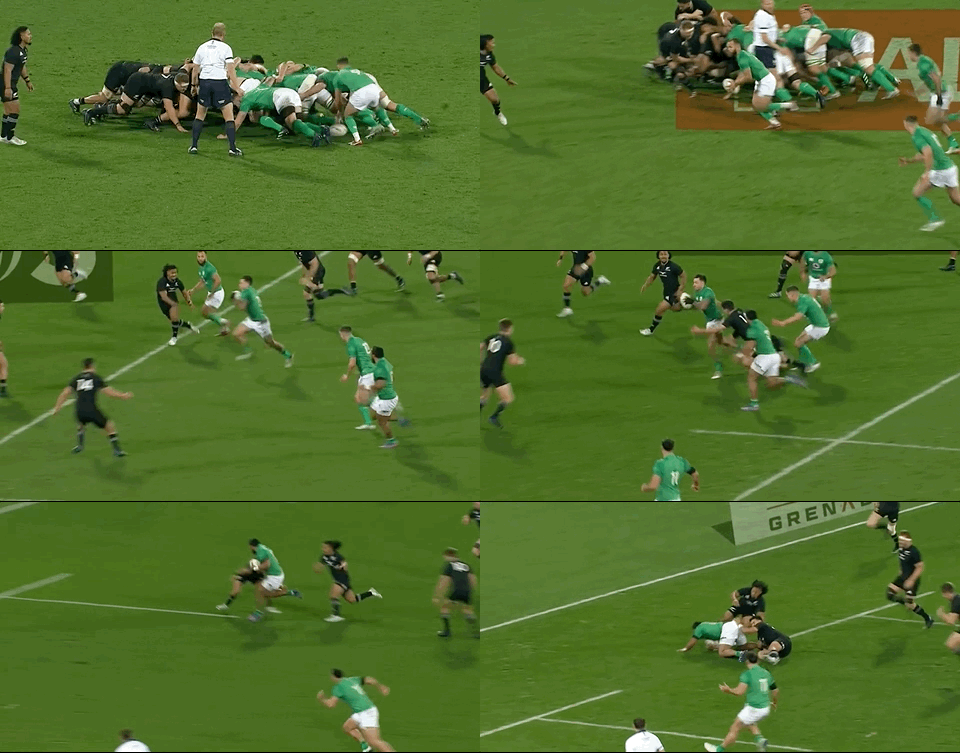
The scrum launch below sees Doris skillfully flick the ball up to Gibson-Park, who runs at Kiwi openside Cane, sitting him down so Lowe gets a one-on-one against Beauden Barrett.
Lowe hitches his way through Barrett’s tackle attempt for a major gainline win and more quick ball.
On second phase, makeshift blindside flanker Aki – filling in while Porter is in the sin bin – bursts around the corner to accept a pass from Gibson-Park as he scoots away from the breakdown.
Cane fails to roll away from his tackle on Aki here and Sexton kicks the penalty for three more Irish points.
Ireland’s fourth try also stems back to a scrum launch.
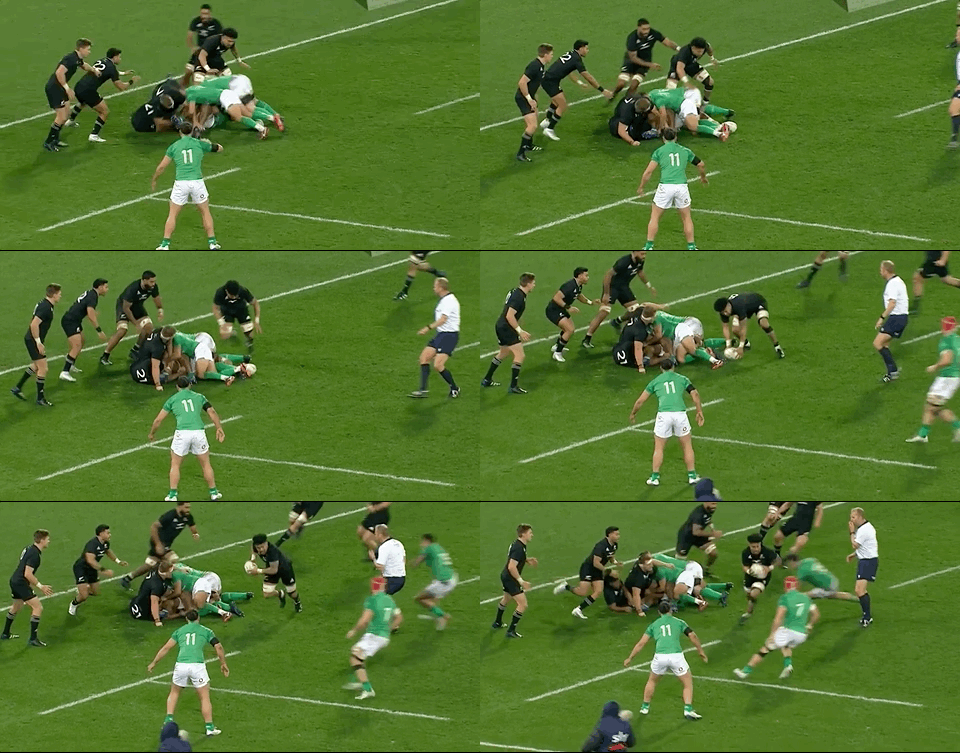
This time, Keenan [red below] starts in behind the scrum with options to attack on either side.
Keenan and Gibson-Park [yellow] identify the opportunity on Ireland’s left and we see below how the scrum-half does a fine job of fixing Kiwi scrum-half Folau Fakatava before passing to his fullback.
Keenan surges onto the ball, runs at Havili and gets himself in behind Jordan in what is a disconnected Kiwi defence.
His offload to Aki is brilliant and the Ireland centre very nearly scores only for a superb tackle by Rieko Ioane to deny him. Still, Ireland win a penalty at this breakdown as Savea is pinged for coming offside to scoop up the ball.
You could argue this one but referee Barnes believes the ball is still in.
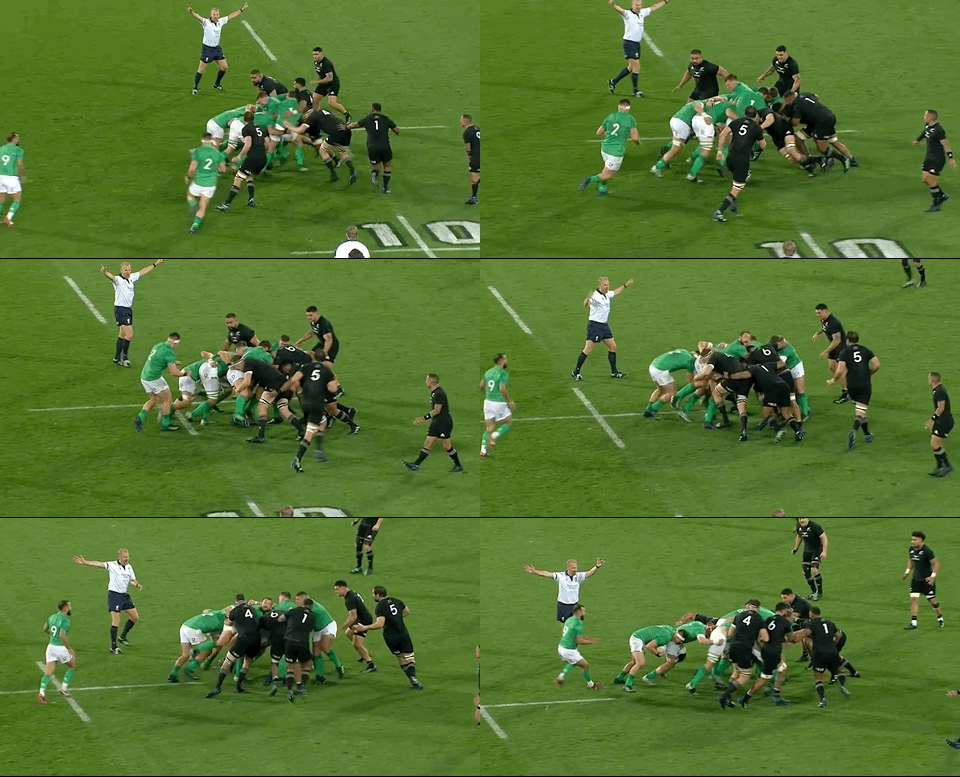
It means an Irish penalty and again they only have interest in the corner. Sexton nudges the ball into touch and the Irish maul fires up once again.
The set-up is exactly identical to van der Flier’s earlier try here, with Ryan winning the ball with a lift from O’Mahony and Beirne and the same players getting into the same mauling slots.
Again, Beirne drags a couple of Kiwis out of the maul as Ireland shift to their left, though less drastically on his occasion as they meet more resistance.
Still, they get moving forward and then Herring makes a decision to dart off the tail of the maul when Tupou Vaa’i starts to collapse it.
The Irish maul swivels back up to Herring’s right, opening a window for him to burst outside Havili and inside the retreating Whitelock.
It’s a strong finish from Herring after another dominant Irish maul.
We rarely see the All Blacks being so thoroughly taken apart at the maul. Having had their own struggles in this area of the game in the first two Tests, it will have been highly pleasing for Ryan and co. to be so strong here in the decider.
Herring’s score gives Ireland a 32-22 lead and though Ireland need some remarkable defensive interventions from Beirne and a few others in the endgame, that scoreline secures them their first-ever series success in New Zealand.
